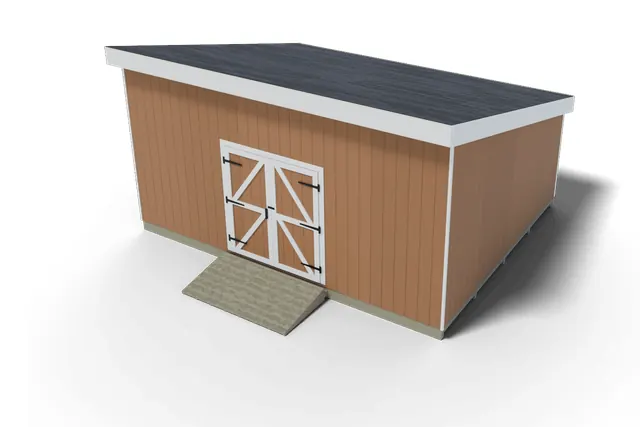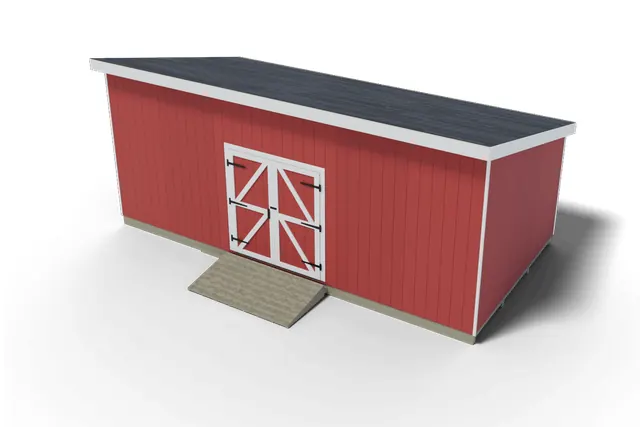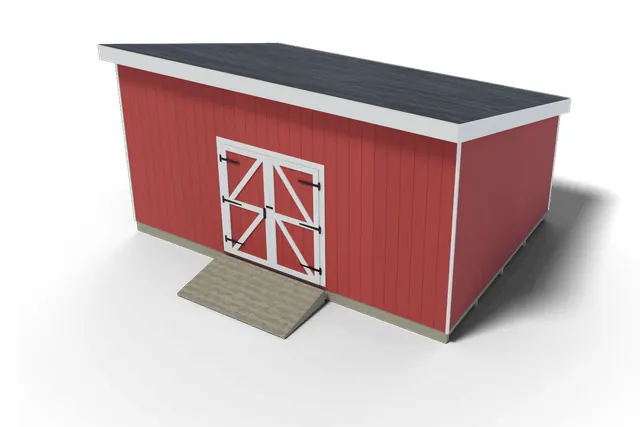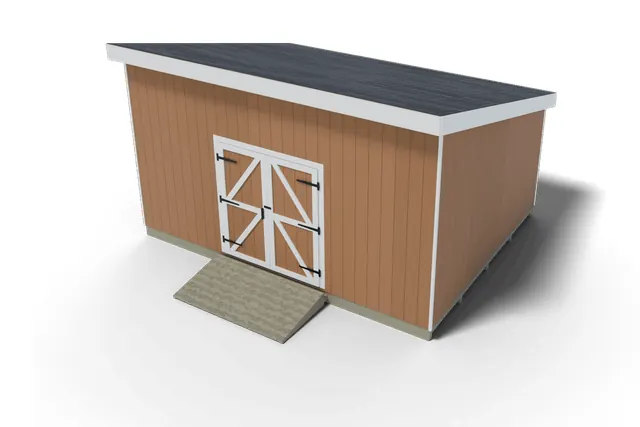
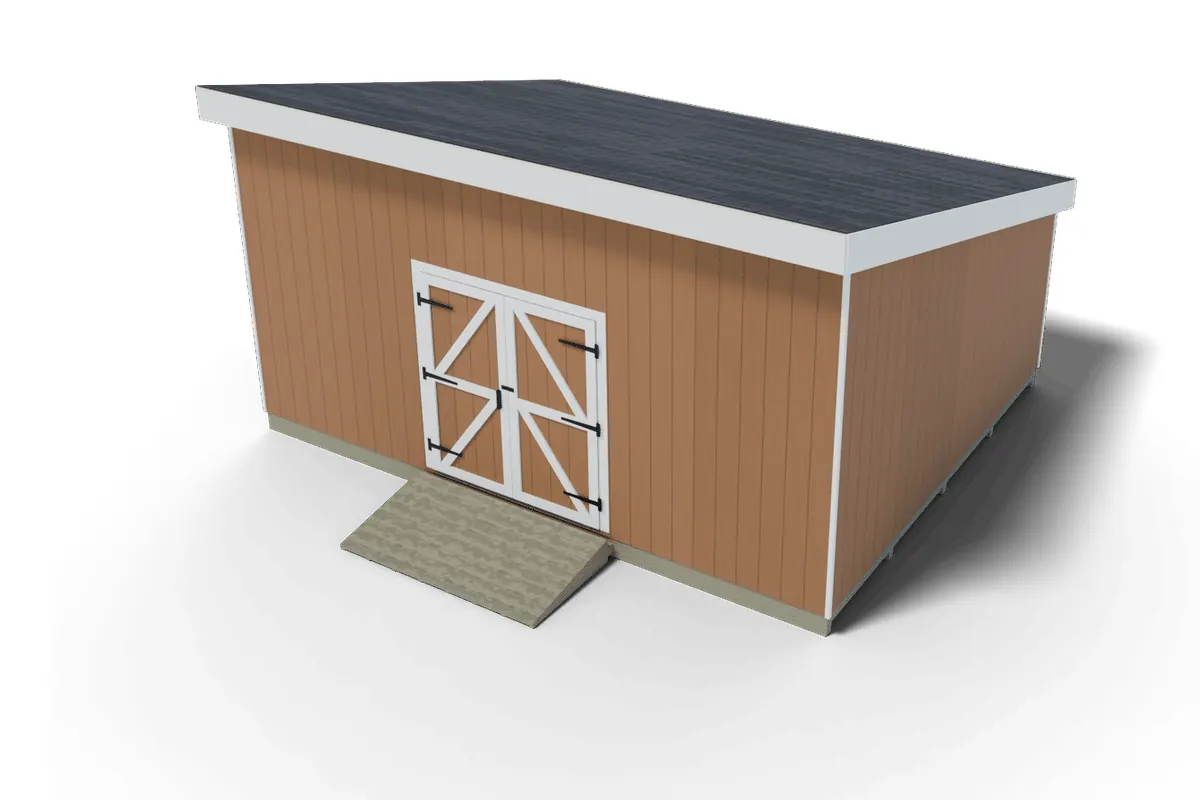
For a 16×20 lean-to shed on skids, the 16×20 lean-to shed material list has 72 framing 2x4s, 18 2×10 rafter boards, 21 treated 2x6s, 10 treated 4x4s, 10 floor sheets, 14 of OSB, 20 of T1-11 and 14 shingle bundles. It assumes a 9′ 10 1/8″ front wall and a 3/12 roof.
The list matches the plan line for line: every quantity and cut length on this page is the one printed in the 74-page 3DSHEDPLANS 16×20 lean-to plan, which has 28 sections and 19 build steps. It counts what to buy by stock length instead of as a board-feet total. The list covers one 72 in double door, one 36 x 36 in window and a detachable ramp.
What this 16×20 lean-to shed material list assumes
The plan is a 20 ft wide by 16 ft deep lean-to shed, with the high wall in front and 320 sq ft of floor. These are its settings:
- Walls: 9′ 10 1/8″ tall at the front and 5′ 11″ at the back, plates included. The front studs are cut to 9′ 5 5/8″, the back studs to 5′ 6 1/2″, and the two side walls get 13 stepped studs each from 5′ 8 3/8″ to 9′ 6 3/16″.
- Spacing: studs, floor joists and rafters all at 16 in on center.
- Roof: 3/12 pitch, 2×10 rafters, 10 in eave overhang front and back and 4 in rake overhang. The roof measures 20′ 9 1/2″ by 17′ 9 1/2″ to the fascia faces.
- Floor: five pressure-treated 4×4 skids, each spliced from an 8 ft and a 12 ft piece, 3′ 11 1/8″ on center, on a compacted gravel pad in a pressure-treated 4×6 frame. The floor has 2×6 joists cut to 15′ 9″ at 16 in on center between two 20 ft rims, and 3/4 in tongue and groove plywood. The top of the deck sits 9 3/4″ above grade.
- Loads: the plan uses common small-shed framing. Heavy snow or high wind can call for closer rafter spacing or larger rafters, so check your local permit office for the loads at your address.
- Openings: a 72 in wide double door centered in the 20 ft front wall, one 36 x 36 in window in the back wall, and a detachable ramp at the door. The side walls have no openings.
Our 16×20 lean-to shed plan is this layout. If you build one of our neighboring plans instead, such as the 14×20 lean-to shed plan or the 16×20 gable shed plan, shop from that plan’s own printable list.
Shopping list by stage: the full 16×20 lean-to shed material list
Lumber sizes are nominal. A 2×4 measures about 1 1/2 x 3 1/2 in, as the American Wood Council explains. Check the grade stamp on plywood and OSB; the APA trademark guide shows how to read it. Treated lumber that touches the gravel or the ground (skids, scabs, pad frame, ramp) must be rated for ground contact (UC4A or higher).
Totals at a glance
| Material | Total |
|---|---|
| 2×4 framing boards, all lengths | 72 |
| 2×4 x 12 ft for temporary braces | 18 |
| 2×4 x 8 ft for brace stakes and deck cleats | 6 |
| Pressure-treated 2×4 x 16 ft (skid splice scabs) | 2 |
| Pressure-treated 2×4 x 8 ft (ramp ledger and filler) | 2 |
| Pressure-treated 2×6 x 16 ft (16 joists plus 1 extra at the rim joint) | 17 |
| Pressure-treated 2×6 for the rims (two at 10 ft, two at 12 ft) | 4 |
| Pressure-treated 2×6 x 14 ft for the ramp deck | 4 |
| Pressure-treated 2×10 x 8 ft for the ramp stringers | 2 |
| Pressure-treated 4×4 skid pieces (five at 8 ft, five at 12 ft) | 10 |
| Pressure-treated 4×6 for the pad frame (one 10 ft, two 12 ft, four 16 ft) | 7 |
| 2×10 x 20 ft (16 rafters, 2 fly rafters) | 18 |
| 2×10 x 16 ft (blocking) | 2 |
| 2×6 x 8 ft (back header) and 2×8 x 14 ft (front header) | 2 |
| 3/4 in T&G plywood sheets (floor) | 10 |
| 7/16 in OSB sheets (roof) | 14 |
| 5/8 in T1-11 sheets (18 walls, 2 door leaves) | 20 |
| 1/2 in plywood sheets (soffit and header fillers) | 2 |
| 3-tab shingle bundles | 14 |
The 72 framing boards are 17 at 8 ft, 31 at 10 ft, 14 at 12 ft, 6 at 14 ft and 4 at 16 ft. With the 18 temporary braces, the 4 stake boards and the 2 cleat boards, the lumber yard order for 2x4s is 23 at 8 ft, 31 at 10 ft, 32 at 12 ft, 6 at 14 ft and 4 at 16 ft: 96 in all.
Floor
| Item | Qty | Used for |
|---|---|---|
| Pressure-treated 4×4 x 12 ft, ground contact | 5 | Skids, 12 ft piece |
| Pressure-treated 4×4 x 8 ft, ground contact | 5 | Skids, 8 ft piece |
| Pressure-treated 2×4 x 16 ft, ground contact | 2 | Skid splice scabs, ten at 3′ 0″ |
| Pressure-treated 2×6 x 16 ft | 17 | 16 floor joists at 15′ 9″ and 1 extra joist at the rim joint |
| Pressure-treated 2×6 x 12 ft | 2 | Rim joists, 10′ 7 1/4″ pieces |
| Pressure-treated 2×6 x 10 ft | 2 | Rim joists, 9′ 4 3/4″ pieces |
| 3/4 in T&G plywood, 4×8 sheet | 10 | Floor decking |
| 1×4 x 8 ft | 3 | Decking filler strip, ripped to 2″ |
| Framing angles, A34 type, about 2 1/2 in long | 85 | One at every joist-to-skid crossing, 8 connector nails each |
| Crushed stone 3/4 in, loose | 6.7 cu yd | Gravel pad and landing, measured loose before tamping |
| Pressure-treated 4×6 x 10 ft, ground contact | 1 | Gravel pad frame |
| Pressure-treated 4×6 x 12 ft, ground contact | 2 | Gravel pad frame |
| Pressure-treated 4×6 x 16 ft, ground contact | 4 | Gravel pad frame |
| Rebar stakes 1/2 in (#4) x 24 in | 36 | Pad frame |
| Galvanized timber spikes 3/8 x 10 in | 16 | Pad frame corners, 2 per corner |
| Deck screws 2 in (or 6d ring-shank nails) | 8 lb | Decking |
| Construction adhesive, 10 oz tube | 13 | A bead on each joist under the decking |
Walls and roof framing
| Item | Qty | Used for |
|---|---|---|
| 2×4 x 8 ft | 17 | Back sill, cap plates, side wall studs |
| 2×4 x 10 ft | 31 | Back wall plate, front wall studs, side wall studs |
| 2×4 x 12 ft | 14 | Back wall plates and studs, back trimmers, front cripples |
| 2×4 x 14 ft | 6 | Back and front cap plates, front trimmers, front wall plates |
| 2×4 x 16 ft | 4 | Side wall plates and sloped top plates |
| 2×6 x 8 ft | 1 | Back header, doubled with a 1/2 in plywood filler |
| 2×8 x 14 ft | 1 | Front header, doubled with a 1/2 in plywood filler |
| 2×10 x 20 ft | 18 | 16 rafters and 2 fly rafters |
| 2×10 x 16 ft | 2 | Blocking between the rafters over each wall |
| Hurricane ties, H2.5A type or equal | 28 | Rafter to plate, 10 nails each |
| Framing angles, A35 type or equal | 4 | End rafters at the 4 corners, 12 nails each |
| Twist strap ties, 18 ga, about 1 1/4 x 12 in | 4 | One at each inside wall corner |
| Temporary braces 2×4 x 12 ft | 18 | Two plumb braces per wall section and the diagonal, reused later |
| 2×4 x 8 ft | 4 | 12 brace stakes, 24 in, pointed |
| 2×4 x 8 ft | 2 | 12 deck cleats, 12 in |
| Connector nails 1 1/2 in | 11 lb | Hurricane ties, straps and framing angles |
The two header fillers of 1/2 in plywood are ripped from the sheet bought with the front wall, and the rest of that sheet goes to the soffit strips. Add 2 or 3 spare studs for bad boards; the plan’s order leaves them out.
Roof covering
| Item | Qty | Used for |
|---|---|---|
| 7/16 in OSB, 4×8 sheet | 14 | Roof sheathing |
| 15 lb felt, 400 sq ft roll | 3 | Underlayment, laid in a double layer at this pitch |
| 3-tab shingles, 26 per bundle | 14 bundles | Roof and starter course |
| Drip edge, 10 ft | 10 | Low eave under the felt, rakes and high edge over it |
| Roofing nails 1 1/4 in galvanized | 14 lb | Shingles and drip edge |
| Roofing cap nails 1 in | 3 lb | Felt |
| Roofing cement, 10 oz tube | 2 | High-edge tabs and exposed nail heads |
| Insect screen, 2 ft x 25 ft | 1 roll | Behind the vent holes and the soffit vent gaps |
| Staples 3/8 in | 1 box | Insect screen |
Siding and trim
| Item | Qty | Used for |
|---|---|---|
| 5/8 in T1-11, 4×10 sheet | 5 | Front wall, one sheet from the sill to the top |
| 5/8 in T1-11, 4×8 sheet | 5 | Back wall |
| 5/8 in T1-11, 4×10 sheet | 2 | Sloped side walls |
| 5/8 in T1-11, 4×9 sheet | 2 | Sloped side walls |
| 5/8 in T1-11, 4×8 sheet | 4 | Sloped side walls |
| 5/8 in T1-11, 4×8 sheet | 2 | Door leaves (one per leaf; the cut-out is too short) |
| 1/2 in plywood, 4×8 sheet | 2 | Header fillers (1) and eave soffit strips (1) |
| 1×12 x 10 ft | 2 | Eave fascia, 9′ 8″ pieces |
| 1×12 x 12 ft | 2 | Eave fascia, 11′ 0″ pieces |
| 1×12 x 20 ft | 2 | Rake fascia |
| 1×4 x 12 ft | 5 | Corner trim |
| 1×4 x 14 ft | 4 | Sloped corner trim, door casing sides, door stiles |
| 1×4 x 8 ft | 10 | Decking filler, door casing head, door rails and Z braces, window casing |
| 1×2 x 8 ft | 2 | Door stop and astragal |
| Drip cap (Z-flashing), 10 ft | 2 | Over the door and window head casings |
| Exterior paint and primer in one | 6 gal | Two coats of about 795 sq ft each |
| Exterior caulk | 3 tubes | Trim joints and casings |
| Siding nails 2 1/2 in (8d), hot-dip galvanized | 20 lb | T1-11 siding and trim |
| Sheathing nails 2 1/2 in (8d) for OSB | 14 lb | Roof sheathing |
Hardware, door, window and ramp
| Item | Qty |
|---|---|
| Framing nails 3 1/2 in (16d), hot-dip galvanized (about 1164 nails plus 10 percent) | 33 lb |
| Door hinges, heavy T-strap, 8 in strap or longer, galvanized | 6 |
| Carriage bolts 1/4 x 2 in with washers and nuts (3 per hinge strap) | 18 |
| Door handle and latch set | 1 |
| Barrel bolts for the fixed leaf, 3 in | 2 |
| Door sweep, brush type, 36 in | 2 |
| Door hold-open hook and eye, 6 in galvanized | 2 |
| Aluminum threshold cap, 6 ft | 1 |
| Exterior screws 1 1/4 in (door frame to T1-11) | 1 lb |
| Exterior screws 3 in (hinge T-parts; wall corners where a hammer will not swing) | 1 box |
| Prefabricated window, 36 x 36 in rough opening | 1 |
| Flashing tape 4 in | 1 roll |
| Wood shims | 1 bundle |
| Ground anchors, screw-in auger type, 30 in or longer, with straps | 8 |
| Structural wood screws 1 1/2 in (anchor straps) | 48 |
| Pressure-treated 2×10 x 8 ft, ground contact (ramp stringers) | 2 |
| Pressure-treated 2×6 x 14 ft, ground contact (ramp deck boards) | 4 |
| Pressure-treated 2×4 x 8 ft, ground contact (ramp ledger and filler) | 2 |
| Ramp screws 3 in | 145 |
| Structural screws 5 in, 1/4 in exterior (ramp ledger) | 12 |
| Ramp hook-and-eye latches, 4 in | 2 |
| Anti-slip grit tape, 2 in x 15 ft | 4 rolls |
Cut list highlights
The bulk of the 16×20 cut list is square cuts: 17 front wall studs at 9′ 5 5/8″, 19 back wall studs at 5′ 6 1/2″ and 17 floor joists at 15′ 9″. The parts below have angles, overhangs, splices or stepped sizes, and each is cut several times, so one layout error repeats. Lumber varies a little from board to board, so dry-fit the first of each part on your own frame before cutting the rest.
| Part | Lumber | Cut length | Qty |
|---|---|---|---|
| Rafter (board length, see below) | 2×10 | 18′ 4 13/16″ | 16 |
| Fly rafter (rake) | 2×10 | 18′ 4 13/16″ | 2 |
| Blocking between rafters (over each wall) | 2×10 | 1′ 2 1/2″ | 26 |
| Blocking between rafters (over each wall) | 2×10 | 1′ 1 3/4″ | 4 |
| Lookout block (rake overhang) | 2×4 | 2 1/2″ | 20 |
| Skid (spliced 8′ 0″ + 12′ 0″) | PT 4×4 | 20′ 0″ | 5 |
| Rim joist (spliced 9′ 4 3/4″ + 10′ 7 1/4″) | PT 2×6 | 20′ 0″ | 2 |
| Skid splice scab (both sides of each skid joint) | PT 2×4 | 3′ 0″ | 10 |
| Front wall plate (spliced 13′ 4 3/4″ + 6′ 7 1/4″) | 2×4 | 20′ 0″ | 2 |
| Front wall cap plate (spliced 6′ 9 3/4″ + 13′ 2 1/4″) | 2×4 | 20′ 0″ | 1 |
| Back wall plate (spliced 11′ 11 1/4″ + 8′ 0 3/4″) | 2×4 | 20′ 0″ | 2 |
| Back wall cap plate (spliced 6′ 8″ + 13′ 4″) | 2×4 | 20′ 0″ | 1 |
| Left and right wall plate | 2×4 | 15′ 4 3/4″ | 1 each |
| Side wall sloped top plate | 2×4 | 15′ 10 7/16″ | 1 each |
| Front header (2×8 doubled + 1/2 ply) | 2×8 | 6′ 3″ | 2 |
| Front trimmer | 2×4 | 6′ 4 1/2″ | 2 |
| Back header (2×6 doubled + 1/2 ply) | 2×6 | 3′ 3″ | 2 |
| Back trimmer | 2×4 | 5′ 1″ | 2 |
| Eave fascia (spliced 9′ 8″ + 11′ 0″) | 1×12 | 20′ 8″ | 2 |
| Rake fascia (length tip to tip) | 1×12 | 18′ 6 7/8″ | 2 |
Rafters. The 18′ 4 13/16″ figure is the board each rafter needs. Along the top edge alone it is 18′ 2 1/2″, including the 10 in eave overhang, so do not lay out 18′ 4 13/16″ on the top edge. The list buys one 20 ft 2×10 per rafter, 16 boards for the rafters and 2 more for the fly rafters, which leaves 1′ 7 1/16″ per board. The rafter offcuts become 4 of the blocking pieces.
Birdsmouths. Each rafter has two, with a 3 1/2″ level seat and a 7/8″ plumb heel, set for a 3/12 pitch (set a speed square to 3 on the common scale). Cut one pattern rafter, test it on both walls at each end of the shed, then trace the rest. The 2 fly rafters sit on the lookout blocks, not on a wall, so they get no birdsmouth.
Rafter weight. Each 20 ft 2×10 weighs about 60 lb and is longer than the room. The plan has two people feed each one in through the open door, low end first.
Splices. Every 20 ft run is spliced from shorter boards: the skids, the rims, the front and back plates and the eave fascia. The plan puts each skid joint under a floor joist with a 3 ft treated 2×4 scab on both sides, each rim joint over a doubled joist, and the plate joints on a different line from the second top plate’s joints so each layer covers the other.
Headers. The 72 in door opening gets a doubled 2×8 header with a 1/2 in plywood filler, on trimmers cut to 6′ 4 1/2″. The bottom plate is cut out of the doorway after the wall is up, so the opening is clear down to the deck. The window gets a doubled 2×6 header on 5′ 1″ trimmers, with a 3′ 0″ sill and two 1′ 11 1/2″ cripples below it.
Stepped side studs. Each side wall has 13 studs that step up from 5′ 8 3/8″ at the back to 9′ 6 3/16″ at the front, each with a beveled top under the sloped plate. The left and right walls are mirror images, so hold each stud against its own plate and mark it before you cut. Studs longer than 7′ 8 5/8″ need full 96 in boards, because the “8 ft stud” in most stores is a 92 5/8 in precut.
Where the waste goes
Buying by stock length means every cut leaves an offcut. The plan picks a stock length for each part that leaves room for squaring the ends, so you know in advance where the scraps come from.
- Front wall studs: a 9′ 5 5/8″ stud from a 10 ft board leaves 6 1/4″.
- Rafters: one 18′ 4 13/16″ rafter from each 20 ft board leaves 1′ 7 1/16″.
- Floor joists: 15′ 9″ from a 16 ft board leaves 2 7/8″ for squaring the ends.
- Skid scabs: five 3′ 0″ scabs from each 16 ft treated 2×4 leave 11 3/8″.
- Eave fascia: each 20′ 8″ fascia is a 9′ 8″ piece and an 11′ 0″ piece, with the joint centered on a rafter tail.
- Lookout blocks: the twenty 2 1/2″ blocks come from back wall stud offcuts, so no board is bought for them.
- No spares: the counts include nothing for rejects. Pick straight stock at the yard, and add a few 2×4 x 10 ft if you expect to cull warped or split boards.
For delivery or a trailer run, the longest boards are the 18 rafter boards and the 2 rake fascia boards at 20 ft. The 16 ft pieces are the treated joists, the pad frame boards, the side wall plates and the blocking stock. Ask the yard to deliver, and order the 4×9 and 4×10 siding sheets early, since many stores special-order them.
Tools and crew for a 16×20 build
- Circular saw with a rip guide, speed square and framing square for the stud and rafter cuts, and a table saw or clamped sawhorses to rip the blocking to 8 5/8″ tall
- Miter saw (or the circular saw and a speed square) for door braces, trim and casing; a reciprocating saw for the doorway bottom plate
- Framing hammer or framing nailer, and a drill/driver for the screws
- 4 ft level, 8 ft straight board, 25 ft tape and a string line for the 20 ft rims and plates
- Hand tamper for the 6.7 cu yd of gravel, laid in thin layers
- Two 8 ft step ladders, a 20 ft extension ladder for the roof, and a rolling scaffold tower for the front fascia, with the high front roof edge about 11′ 9″ above the ground
- A crew of two for each lift: the walls go up as bare frames in sections, the front at about 220 lb and 100 lb (the heaviest lift), the back at about 150 lb and 80 lb and the side walls at about 170 lb each, and the floor frame weighs about 680 lb once nailed
Common mistakes
- Buying 2×8 rafters. Our smaller lean-to lists use 2×6 or 2×8 rafters, but this plan uses 2×10 for the 15′ 5″ clear span. Do not copy a smaller list and scale it up.
- Short rafter stock. A 16 ft board cannot make an 18′ 4 13/16″ rafter. The rafters and the rake fascia need 20 ft boards.
- Forgetting the floor angles. The plan puts a framing angle at every joist-to-skid crossing, 85 in all. They are on the hardware list, not the lumber list.
- Forgetting the door sheets. The piece cut out of the front wall is too short for a 6′ 5 1/4″ door leaf, so each leaf needs its own new T1-11 sheet.
- Using precut studs at full length. A precut stud is 92 5/8 in, too short for the taller studs on this list. The plan buys full 96 in boards or 10 ft boards for them.
- Deep birdsmouths. Keep the seat at 3 1/2″ and the heel at 7/8″ so the notch stays under a third of the rafter’s depth.
- Skipping the ground anchors. An empty shed on skids can slide in a strong gust. The list has 8 anchors along the two outside skids.
- Planning to drag it later. The 4×4 skids carry the shed on a level, compacted pad. A 320 sq ft shed is heavy, so if you ever need to move it, ask a mover rather than dragging it on the skids.
- Swapping materials without recounting. This list is for 3-tab shingles and T1-11. Architectural shingles, metal roofing or lap siding cover differently, so recount from the coverage printed on the bundle or the maker’s install guide.
- Untreated wood near the ground. Skids, rims, joists and the ramp are pressure treated; plain framing lumber there rots. Use ground-contact rated wood for the skids, and hot-dip galvanized nails and treated-lumber rated screws in treated wood. The USDA Wood Handbook covers why wet, untreated wood decays.
Whether a 320 sq ft shed needs a permit, and what setbacks and tie-downs apply, varies by town, so check your local permit office before you order. Our shed permit checklist lists what to ask. The ramp has its own steps in the plan, and our shed ramp guide covers the idea.
For how to read any list like this one, see our shed material list guide. For the base under the skids, see shed foundation options. For a rough budget, see how much it costs to build a shed, then price this list at two yards. For other sizes, try the shed material calculator.
Get the full plan
The 16×20 lean-to shed plan is a 3DSHEDPLANS PDF with 74 pages and 28 sections, 19 of them step-by-step build steps, with drawings, cut details and its own printable material list. The plan prints how long each stage takes for two people (128 hours in all) and the weight of each bare wall frame. For a shallower lean-to, compare the 12×20 lean-to shed material list and the 14×20 lean-to shed plan.
Want to see the format first? Download the free 16×20 lean-to shed plan preview PDF. Need more or less room? Compare all lean-to shed plans or browse every size on the shed plans page.
Frequently asked questions
What is on a 16×20 lean-to shed material list?
For a 16×20 lean-to shed the plan lists 72 framing 2x4s, 18 2×10 x 20 ft rafter boards, 17 treated 2×6 x 16 ft joists, 10 sheets of 3/4 in plywood, 14 of OSB, 20 of T1-11 and 14 shingle bundles, plus trim, nails and hardware.
Is there a free 16×20 lean-to shed plan with a material list?
This page repeats the paid plan's shopping list and key cut lengths for free. The 3DSHEDPLANS 16×20 lean-to shed plan is a 74-page PDF with its own printable material list and cut list, and an 8-page free preview shows the format first.
How many 2x4s do I need for a 16×20 lean-to shed?
72 framing boards: 17 at 8 ft, 31 at 10 ft, 14 at 12 ft, 6 at 14 ft and 4 at 16 ft. The plan adds 18 2x4s at 12 ft for temporary braces and 6 at 8 ft for brace stakes and deck cleats, so the yard order is 96.
How many sheets of plywood, OSB and siding does a 16×20 lean-to shed need?
10 sheets of 3/4 in tongue and groove plywood for the floor, 14 sheets of 7/16 in OSB for the roof, 20 sheets of 5/8 in T1-11 for the walls and door leaves, and 2 sheets of 1/2 in plywood for the soffit and the header fillers.
What size rafters does a 16×20 lean-to shed need?
In the 16×20 lean-to plan the rafters are 2×10 at 16 in on center, each rafter board 18' 4 13/16" long and cut from a 20 ft board. Heavy snow or high wind can call for more, so check your local permit office for your area's loads.
Shed building guides
- 4×12 Firewood Shed Material List: Lumber, Slats, Hardware
- 8×8 Chicken Coop Material List: Lumber, Sheets, Hardware
- 4×8 Shed Material List: Lumber, Sheets, Hardware
- 4×6 Lean-To Shed Material List: Lumber, Sheets, Hardware
- 16×16 Shed Material List: Lumber, Sheets and Hardware
- How to Insulate a Shed: Walls, Roof and Floor