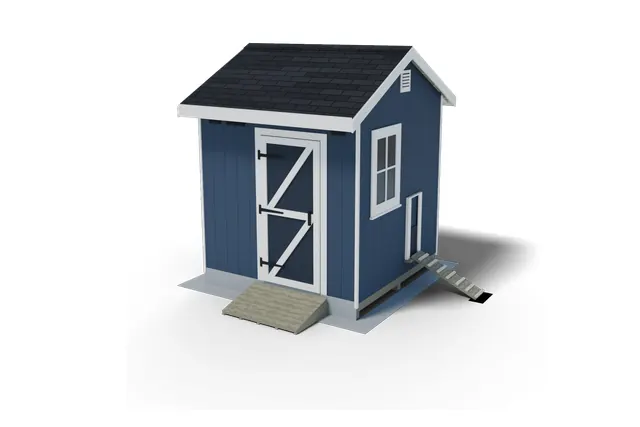
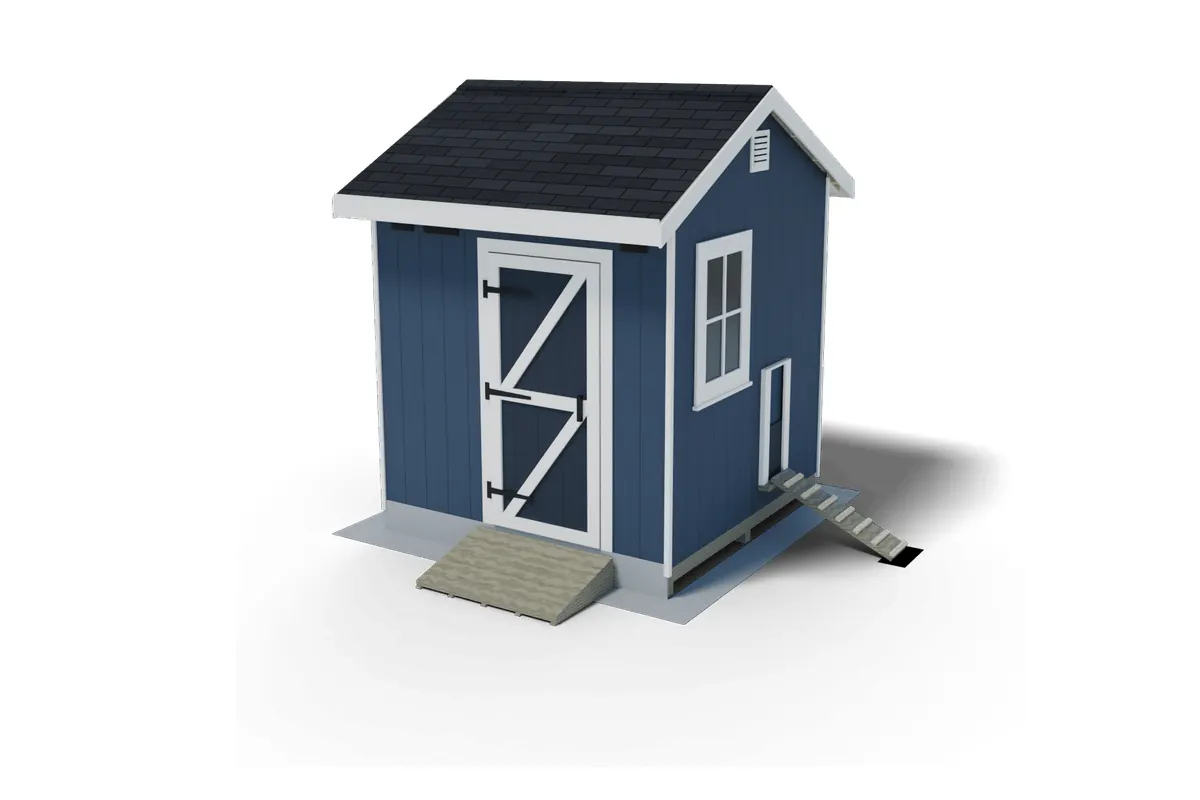
An 8×8 chicken coop material list for this walk-in coop comes to 78 framing 2x4s, three 2x6s and one 2×8, 3 pressure-treated 4×4 skids and 9 pressure-treated 2x6s for the floor. Sheets: 10 T1-11, 5 OSB and 7 plywood, plus 4 shingle bundles and 5 rolls of hardware cloth.
Every row below is taken line for line from the shopping list and cut list of the 3DSHEDPLANS 8×8 walk-in chicken coop plan. The coop is built like a small gable shed, so the shell rows look like a shed list, and the coop fit-out adds the nest boxes, roosts, pop door and hardware cloth.
What this 8×8 coop list assumes
The coop is 8 ft wide and 8 ft deep, 64 sq ft of floor, for up to 16 standard hens with a run. These are its settings:
- Walls: 2×4 walls 16 in on center with 7′ 6″ studs. Some of the 8 ft 2x4s must be full 96 in boards, not 92 5/8 in precut studs, and each wall’s 2×4 line says how many.
- Roof: a 6/12 gable roof with 2×4 rafters, a 2×6 ridge board, rafter ties and collar ties, 12 in eaves and 4 in rakes, covered with 7/16 in OSB, 15 lb felt and 3-tab shingles.
- Base: a gravel pad in a pressure-treated 4×6 frame, three pressure-treated 4×4 skids, 2×6 joists and 3/4 in tongue-and-groove plywood, with the floor 9 3/4″ above grade.
- Openings: a 36 in walk-in door in the front wall, a 24 by 36 in window and a 12 by 14 in pop door in the right wall, and the nest box opening in the back wall.
- Coop parts: 4 nest boxes in a bump-out with an outside lid, 2 roost bars over a lift-out droppings board, screened vent holes, two louvered gable vents, sheet vinyl on the floor and a hardware cloth skirt.
- Ramps: a detachable ramp at the people door and a cleated hen ramp at the pop door, which is why the list has pressure-treated 2×10, 2×6, 2×4 and 2×12 pieces.
The 8×8 chicken coop material list by stage
Lumber sizes are nominal. A 2×4 measures about 1 1/2 x 3 1/2 in and a 2×6 about 1 1/2 x 5 1/2 in, as the American Wood Council explains. Plywood, OSB and T1-11 carry a grade stamp; the APA trademark guide shows how to read it.
Each board is listed in the stock length that wastes the least for its parts, and the For column names the parts it becomes.
Foundation and floor
| Item | Qty | For |
|---|---|---|
| 1×4 x 8 ft | 1 | Decking filler strip (1×4 ripped to 1″) (1 @ 8′ 0″) |
| Pressure-treated 2×6 x 8 ft | 9 | Rim joist (band) (2 @ 8′ 0″); Floor joist (7 @ 7′ 9″) |
| Pressure-treated 4×4 x 8 ft, ground contact (UC4A or higher) | 3 | Skid (3 @ 8′ 0″) |
| Floor decking: sheet 4 by 8 ft 3/4 T&G plywood | 2 | Floor deck: the lettered pieces on the decking map (step Floor decking) |
Front wall
| Item | Qty | For |
|---|---|---|
| 2×4 x 14 ft | 1 | Front trimmer (2 @ 6′ 4 1/2″) |
| 2×4 x 8 ft (3 of them full 96 in boards, not 92 5/8 in precut studs) | 13 | Front wall plate (2 @ 8′ 0″); Front wall cap plate (1 @ 7′ 5″); Front wall stud (9 @ 7′ 6″); Front cripple (2 @ 8″) |
| 2×6 x 8 ft | 1 | Front header (2×6 doubled + 1/2 ply) (2 @ 3′ 3″) |
Back wall
| Item | Qty | For |
|---|---|---|
| 2×4 x 12 ft | 1 | Back cripple (3 @ 3′ 10″) |
| 2×4 x 8 ft (4 of them full 96 in boards, not 92 5/8 in precut studs) | 13 | Back wall plate (2 @ 8′ 0″); Back wall cap plate (1 @ 7′ 5″); Back wall stud (7 @ 7′ 6″); Back lower cripple (3 @ 1′ 4 3/4″); Back sill (1 @ 4′ 5 1/2″); Back trimmer (2 @ 3′ 0 3/4″) |
| 2×8 x 10 ft | 1 | Back header (2×8 doubled + 1/2 ply) (2 @ 4′ 8 1/2″) |
Left wall
| Item | Qty | For |
|---|---|---|
| 2×4 x 8 ft (1 of them a full 96 in board, not a 92 5/8 in precut stud) | 10 | Left wall plate (2 @ 7′ 4 3/4″); Left wall cap plate (1 @ 8′ 0″); Left wall stud (7 @ 7′ 6″) |
Right wall
| Item | Qty | For |
|---|---|---|
| 2×4 x 14 ft | 1 | Right trimmer (2 @ 6′ 6″) |
| 2×4 x 8 ft (4 of them full 96 in boards, not 92 5/8 in precut studs) | 14 | Right wall plate (2 @ 7′ 4 3/4″); Right wall cap plate (1 @ 8′ 0″); Right wall stud (8 @ 7′ 6″); Right cripple (1 @ 5′ 4″); Right lower cripple (1 @ 3′ 4 1/2″); Right sill (1 @ 2′ 0″) |
| 2×6 x 8 ft | 1 | Right header (2×6 doubled + 1/2 ply) (2 @ 2′ 3″) |
Wall siding
| Item | Qty | For |
|---|---|---|
| Wall siding: sheet 4 by 8 ft 5/8 T1-11 | 8 | Wall siding and sheathing in one: the lettered pieces on each wall’s siding map |
| Z-flashing (wall siding to gable siding): 10 ft piece | 2 | The joint between the wall siding and the gable siding |
Roof framing
| Item | Qty | For |
|---|---|---|
| 2×4 x 10 ft | 6 | Rafter tie (interior pairs, at the plates) (5 @ 8′ 0″); Frieze block (over the eave walls, top beveled) (8 @ 1′ 1″) |
| 2×4 x 12 ft | 10 | Rafter (14 @ 5′ 8″); Fly rafter (rake) (4 @ 5′ 8″); Gable vent sill and header (flat) (4 @ 2′ 6 1/2″) |
| 2×4 x 14 ft | 1 | Collar tie (3 @ 4′ 2 9/16″) |
| 2×4 x 8 ft (1 of them a full 96 in board, not a 92 5/8 in precut stud) | 2 | Gable plate tie (flat under the first 2 rafter ties) (2 @ 2′ 6 3/4″); Gable plate tie (flat under the first 2 rafter ties) (2 @ 2′ 9 3/4″) |
| 2×6 x 10 ft | 1 | Ridge board (1 @ 8′ 8″) |
Roof covering
| Item | Qty | For |
|---|---|---|
| Roof sheathing: sheet 4 by 8 ft 7/16 OSB | 5 | Roof deck: the lettered pieces on the sheathing map |
| Roofing felt: roll 15 lb (400 sq ft; this roof uses about 110 sq ft with the laps, keep the rest dry for repairs) | 1 | Underlayment over the roof sheathing, under the shingles |
| Asphalt shingles: bundle 3-tab, 26 shingles, incl. starter and ridge cap | 4 | Starter strips, the roof courses and the cap pieces (Shingles step) |
| Drip edge: 10 ft piece | 6 | Eaves under the felt, rakes over it |
Fascia, soffit and gable siding
| Item | Qty | For |
|---|---|---|
| 1×6 x 10 ft | 2 | Fascia (eave) (2 @ 8′ 8″) |
| 1×6 x 12 ft | 2 | Fascia (rake; both ends plumb and parallel: 5′ 7 15/16″ along either edge, length given tip to tip) (4 @ 5′ 10 11/16″) |
| Gable siding: sheet 4 by 8 ft 5/8 T1-11 | 1 | The gable triangles above the walls (gable siding map) |
| Eave soffit (ripped 1/2 plywood): sheet 4 by 8 ft 1/2 plywood | 2 | Soffit strips under the eaves (Fascia and soffit step) |
Door, window and trim
| Item | Qty | For |
|---|---|---|
| 1×2 x 8 ft | 2 | Door stop (header) (1 @ 3′ 0″); Door stop (latch side) (1 @ 6′ 5 1/4″) |
| 1×4 x 14 ft | 2 | Door casing (sides) (2 @ 6′ 9 1/2″); Door stile (2 @ 6′ 5 1/4″) |
| 1×4 x 16 ft | 2 | Corner trim (eave-wall faces) (4 @ 7′ 11 1/8″) |
| 1×4 x 8 ft | 9 | Corner trim (gable-wall faces) (4 @ 7′ 9 7/16″); Door casing (head, between the side casings) (1 @ 3′ 0″); Window casing (sides) (2 @ 3′ 0″); Window casing (head and sill) (2 @ 2′ 7″); Door rail (3 @ 2′ 4 1/2″); Door Z brace (along either edge) (2 @ 3′ 5 3/16″) |
| Door leaf siding (a new sheet; the cut-out is too short): sheet 4 by 8 ft 5/8 T1-11 | 1 | The door leaf (Door step) |
| Door hinges (heavy T-strap, 8 in strap or longer, galvanized): each | 3 | Hanging the door leaf |
| Door handle and latch (pull handle + gate latch or hasp with a padlock loop): set | 1 | Opening and latching the door leaf |
| Door sweep, brush type, 36 in, with its screws (cut to 2′ 10 15/16″): each | 1 | The bottom edge of the door leaf, inside face (Door step) |
| Door hold-open hook and eye, 8 in galvanized: each | 1 | Holding the open door in wind (Door step; where the open leaf reaches a corner, fitted in Trim and finish at the corner) |
| Prefabricated window, 24 x 36 in rough opening: each | 1 | The window opening (window step) |
Coop fit-out: nest boxes, roosts, pop door and hardware cloth
These are the parts that turn the shell into a hen house. The hardware cloth is 1/2 in galvanized welded mesh, never chicken wire, and it is screwed down every 4 in with fender washers rather than stapled.
| Item | Qty | For |
|---|---|---|
| 1×2 x 8 ft | 3 | Window screen frame side (2 @ 3′ 3″); Window screen frame rail (between the sides) (2 @ 2′ 0″); Pop door guide spacer (2 @ 2′ 10″) |
| 1×4 x 8 ft | 3 | Nest box hinge rail (over the opening, between the end panels, top edge ripped at 25 deg) (1 @ 4′ 5 3/8″); Nest box bedding lip (inside) (1 @ 4′ 8 1/2″); Pop door guide cover (2 @ 2′ 10″) |
| 1×8 x 8 ft | 1 | Bedding board (drops in behind the people door) (1 @ 3′ 3 3/4″) |
| 2×4 x 8 ft (1 of them a full 96 in board, not a 92 5/8 in precut stud) | 6 | Roost bar (2×4 wide side up, edges rounded) (2 @ 7′ 4 3/4″); Roost ledger (front and back walls) (2 @ 2′ 5 3/4″); Droppings board ledger (left wall) (1 @ 7′ 4 3/4″); Droppings board rail (on edge, open side) (1 @ 7′ 4 3/4″); Nest box sill block (on edge on the rough sill, between the arms) (1 @ 4′ 2 1/2″) |
| Pressure-treated 2×12 x 8 ft, ground contact (UC4A or higher) | 1 | Hen ramp, ground-contact PT (bottom end cut level) (1 @ 3′ 8 3/4″) |
| Pressure-treated 2×4 x 8 ft | 2 | Nest box arm (on edge on the rough sill, lapped on the trimmer, out under the box) (2 @ 1′ 2 1/8″); Hen ramp ledger (flat, under the pop door) (1 @ 1′ 6″) |
| Hardware cloth 1/2 in, galvanized welded, 19 gauge, 36 in x 10 ft roll (never chicken wire): roll | 5 | Every vent hole, both gable vents, the window screen and the skirt (Vent holes; Window screen, floor and skirt) |
| Pan-head screws 1 in, exterior, with 1/2 in fender washers (hardware cloth every 4 in): each | 200 | Hardware cloth over the vent holes and the gable vents, every 4 in with a fender washer |
| Pan-head screws 1 1/2 in, exterior, with 1/2 in fender washers (skirt top edge, through the siding): each | 120 | The skirt’s top edge through the siding into the rim and end joists, every 4 in |
| Landscape staples 6 in (skirt, every 12 in): each | 50 | Pinning the skirt’s outer edge to the pad |
| Exterior plywood 3/4 in (nest box, droppings board): sheet 4 by 8 ft 3/4 exterior plywood | 2 | Nest boxes and the droppings board halves (parts table in Nest box bank) |
| Exterior screws 1 5/8 in (nest box, guide spacers, cleats, frames, kick band): lb | 2 | Nest box assembly, pop door guides and top stop, hen ramp cleats, window screen frame, hinge strip and the kick band |
| Exterior caulk (vinyl top edge, hinge rail, nest box): tube | 2 | The vinyl’s top edge, the nest box hinge rail and the box joints |
| Exterior wood glue (nest box joints): bottle | 1 | Gluing the nest box floor onto the arms and the front panel on |
| Exterior screws 3 in (roost and droppings ledgers, vent nailers, nest box sill block): each | 100 | Roost and droppings ledgers, vent nailers and the nest box sill block |
| Exterior screws 3 1/2 in (pop door guides and bedding board slots into the framing): each | 30 | Pop door guides: one row through cover and spacer into each king, every 6 in |
| Structural screws 6 in, 1/4 in exterior (hen ramp ledger): each | 6 | The hen ramp ledger, 2 at each end |
| Structural screws 4 in, 1/4 in exterior (nest box arms into the trimmers): each | 8 | The nest box arms, 3 through each into its trimmer and king |
| Sheet vinyl flooring, 12 ft wide x 10 ft (runs 12 in up the walls): piece | 1 | The coop floor, run 12 in up the walls (Window screen, floor and skirt) |
| Hasp 3 1/2 in, galvanized (second latch on the people door): each | 1 | A second latch on the people door, with a carabiner |
| Carabiner snap hooks, 2 in galvanized (second latch on every door and lid: raccoons open one): each | 4 | A second latch on the people door, the nest box lid and the pop door |
| Turn buttons, galvanized (window screen frame): each | 5 | Holding the window screen frame in place |
| Flat corner plates 3 in, galvanized, with their screws (window screen frame): each | 4 | The window screen frame’s corners |
| Pan-head screws 5/8 in, exterior, with 1/2 in fender washers (window screen cloth): each | 40 | Hardware cloth onto the framing and the window screen frame, every 4 in |
| Plywood 1/2 in kick band, ripped into 12 in strips (backs the vinyl inside the walls): sheet 4 by 8 ft 1/2 plywood | 1 | A 12 in band inside the walls that backs the sheet vinyl (Window screen, floor and skirt) |
| Strap hinges 4 in, galvanized (nest box lid): each | 2 | Nest box lid |
| Hasps 3 1/2 in, galvanized (nest box lid): each | 2 | Nest box lid, with a carabiner each |
| Exterior plywood 1/2 in handy panel (pop door panel, slides in the 3/4 in guides): panel 2×2 ft 1/2 exterior plywood | 1 | The pop door panel |
| Barrel bolt 3 in (pop door, open and shut): each | 1 | Pop door, held shut or open |
| Hook and eye 3 in (hen ramp to its ledger): each | 2 | Hen ramp onto its ledger |
| Concrete paver 8 by 16 by 2 in (hen ramp toe): each | 1 | Under the hen ramp’s toe |
| Gravel or paver base, 0.5 cu ft bag (bed under the hen ramp paver, past the pad): each | 1 | Under the hen ramp’s toe |
| Pull handle 4 in (pop door): each | 1 | Pop door panel |
Ramp, hardware, pad and temporary parts
Ramp
| Item | Qty | For |
|---|---|---|
| Pressure-treated 2×10 x 8 ft, ground contact (UC4A or higher) | 1 | Ramp stringer blank (two tapered stringers from each piece) (3 @ 2′ 4″) |
| Pressure-treated 2×4 x 8 ft, ground contact (UC4A or higher) | 1 | Ramp ledger (on the rim joist and skid) (1 @ 3′ 9″) |
| Pressure-treated 2×6 x 8 ft, ground contact (UC4A or higher) | 3 | Ramp deck board (5 @ 3′ 9″) |
| Ramp hook-and-eye latches, 4 in galvanized: each | 2 | Holding the ramp to its ledger (step Build the ramp) |
| Ramp screws 3 in exterior deck screws (2 per board per stringer): each | 56 | The ramp boards into the stringers (step Build the ramp) |
| Structural screws 3 in, 1/4 in exterior (ramp ledger into the rim joist and the skid): each | 6 | The ramp ledger into the rim joist and the skid (step Build the ramp) |
| Anti-slip grit tape for the ramp boards, 2 in x 15 ft (one strip along each board): roll | 2 | One strip along each ramp board (step Build the ramp) |
Hardware
| Item | Qty | For |
|---|---|---|
| Carriage bolts 1/4 x 2 in, galvanized, with washers and nuts (3 per hinge strap): each | 9 | The hinge straps on the door leaf, nuts inside (Door step) |
| Aluminum threshold cap (angle about 1 x 1 1/2 in), 3 ft piece: each | 1 | The deck edge across the door opening (Door step) |
| Framing nails 3 1/2 in (16d) hot-dip galvanized (about 943 nails + 10 %): lb | 26 | Every framing joint (fastener schedule) |
| Siding nails 2 1/2 in (8d) hot-dip galvanized: lb | 11 | T1-11 siding and trim |
| Sheathing nails 2 1/2 in (8d) for OSB: lb | 3 | Roof sheathing: 6 in apart on the edges, 12 in in the field |
| Roofing nails 1 1/4 in galvanized: lb | 3 | Shingles and drip edge |
| Deck screws 2 in (or 6d ring-shank nails): lb | 3 | Floor decking: 6 in apart on the edges, 12 in in the field |
| Construction adhesive, 10 oz tubes: each | 4 | A bead on each joist under the floor decking |
| Hurricane ties (rafter to plate), H2.5A type or equal, 10 nails each: each | 10 | Each rafter to the top plate |
| Framing angles for the end rafters at the 4 corners (A34 type, about 2 1/2 in long, or equal, 8 nails each): each | 4 | The two end rafters to the plates at the 4 corners, where the side wall covers the inside face |
| Framing angles for the floor frame on the skids, one at every joist-to-skid crossing (A34 type, about 2 1/2 in long, 18 ga galvanized, or equal), 8 connector nails each: each | 21 | One at every joist-to-skid crossing (Floor frame step) |
| Framing angles for the gable plate ties (A34 type, about 2 1/2 in long, or equal, 8 nails each): each | 4 | The flat 2×4 plate ties to the gable wall plates (roof framing step) |
| Ground anchors, screw-in auger type, 30 in or longer, galvanized, each with a galvanized steel strap (an empty shed on skids slides in a strong gust: Anchor the shed): each | 4 | Holding the shed down in wind: along the two outside skids (Anchor the shed step) |
| Structural wood screws 1 1/2 in, exterior (anchor straps: 4 into the skid and 2 into the rim per anchor): each | 24 | Each ground-anchor strap to the outside skid and the rim joist (Anchor the shed step) |
| Crushed stone 3/4 in for the pad (loose, before tamping): cu yd | 1.9 | The gravel pad under the skids (Preparation step) |
| Pressure-treated 4×6 x 8 ft, ground contact (UC4A or higher), for the gravel pad frame: each | 1 | The frame around the gravel pad and the landing (Preparation step) |
| Pressure-treated 4×6 x 16 ft, ground contact (UC4A or higher), for the gravel pad frame: each | 3 | The frame around the gravel pad and the landing (Preparation step) |
| Rebar stakes 1/2 in (#4) x 24 in, for the pad frame: each | 22 | Pinning the pad frame to the ground: about every 4 ft and near each end of every piece (Preparation step) |
| Galvanized timber spikes 3/8 in x 10 in for the pad frame corners (2 per corner): each | 16 | Joining the pad frame’s corners (Preparation step) |
| Exterior paint and primer in one (2 coats, about 383 sq ft each): gallon | 3 | Siding, trim and door, two coats |
| Exterior caulk: tube | 3 | Trim joints and the window and door casings |
| Roofing cap nails 1 in (felt): lb | 1 | Holding the felt down |
| Wood shims (door and window): bundle | 1 | Plumbing the door and the window in their openings |
| Roofing cement, 10 oz tubes: each | 2 | Sealing the last cap pieces and any exposed nail heads |
| Exterior screws 1 1/4 in (door frame to T1-11): lb | 1 | Door frame boards to the T1-11 leaf |
| Exterior screws 3 in (hinge T-parts through the casing into the framing; wall corners where a hammer will not swing): box | 1 | Hinge T-parts through the casing into the king stud and trimmer |
| Louvered gable vent 8 x 8 in, net free area 17.6 sq in or more: each | 2 | Vent openings in the gable ends |
| Connector nails 1 1/2 in (hurricane ties and straps): lb | 4 | Every hurricane tie, strap and framing angle |
| Flashing tape 4 in (window opening): roll | 1 | Wrapping the window rough opening |
| Drip cap (Z-flashing) over the window and door head casings, 10 ft: each | 1 | Over the window and door head casings |
| Staples 3/8 in for the staple gun (insect screen): box | 1 | Stapling the insect screen over the vent gaps and holes |
| Insect screen for vent holes/gaps, 2 ft x 25 ft: roll | 1 | Behind the vent holes and the soffit vent gaps |
| Temporary braces 2×4 x 12 ft (reuse later): 2 plumb braces per wall section and the diagonal each section is squared with; each wall’s plumb braces come off once that wall is sided: each | 12 | Holding the walls plumb and square until the siding is on, reused later |
| Temporary braces for the center gable studs 2×4 x 12 ft (step Ridge): each | 4 | Holding the two center gable studs plumb while the ridge goes on (step Ridge) |
| 2×4 x 8 ft for 8 stakes 24 in, pointed (one per plumb brace): each | 3 | Staking the plumb braces outside the walls |
| 2×4 x 8 ft for 12 deck cleats 12 in (one per plumb brace once it moves inside, 4 for the center gable stud braces): each | 2 | Screwed to the deck to hold the brace feet inside |
Pressure-treated lumber that touches the gravel or the ground (skids, pad frame, ramps) must be rated for ground contact (UC4A or higher).
Cut list: every part
Cut one of each angled part first, test it on the frame, then cut the rest. The right wall holds both the window and the pop door, so its cripples, sills, headers and trimmers come in two lengths: label each one as you cut it.
| Part | Lumber | Cut length | Qty |
|---|---|---|---|
| Skid | PT 4×4 | 8′ 0″ | 3 |
| Rim joist (band) | PT 2×6 | 8′ 0″ | 2 |
| Floor joist | PT 2×6 | 7′ 9″ | 7 |
| Decking filler strip (1×4 ripped to 1″) | 1×4 | 8′ 0″ | 1 |
| Front wall plate | 2×4 | 8′ 0″ | 2 |
| Front wall cap plate | 2×4 | 7′ 5″ | 1 |
| Front wall stud | 2×4 | 7′ 6″ | 9 |
| Front cripple | 2×4 | 8″ | 2 |
| Front header (2×6 doubled + 1/2 ply) | 2×6 | 3′ 3″ | 2 |
| Front trimmer | 2×4 | 6′ 4 1/2″ | 2 |
| Back wall plate | 2×4 | 8′ 0″ | 2 |
| Back wall cap plate | 2×4 | 7′ 5″ | 1 |
| Back wall stud | 2×4 | 7′ 6″ | 7 |
| Back cripple | 2×4 | 3′ 10″ | 3 |
| Back header (2×8 doubled + 1/2 ply) | 2×8 | 4′ 8 1/2″ | 2 |
| Back lower cripple | 2×4 | 1′ 4 3/4″ | 3 |
| Back sill | 2×4 | 4′ 5 1/2″ | 1 |
| Back trimmer | 2×4 | 3′ 0 3/4″ | 2 |
| Left wall plate | 2×4 | 7′ 4 3/4″ | 2 |
| Left wall cap plate | 2×4 | 8′ 0″ | 1 |
| Left wall stud | 2×4 | 7′ 6″ | 7 |
| Right wall plate | 2×4 | 7′ 4 3/4″ | 2 |
| Right wall cap plate | 2×4 | 8′ 0″ | 1 |
| Right wall stud | 2×4 | 7′ 6″ | 8 |
| Right cripple | 2×4 | 6 1/2″ | 1 |
| Right cripple | 2×4 | 5′ 4″ | 1 |
| Right header (2×6 doubled + 1/2 ply) | 2×6 | 1′ 3″ | 2 |
| Right header (2×6 doubled + 1/2 ply) | 2×6 | 2′ 3″ | 2 |
| Right lower cripple | 2×4 | 5″ | 1 |
| Right lower cripple | 2×4 | 3′ 4 1/2″ | 1 |
| Right sill | 2×4 | 1′ 0″ | 1 |
| Right sill | 2×4 | 2′ 0″ | 1 |
| Right trimmer | 2×4 | 1′ 8 1/2″ | 2 |
| Right trimmer | 2×4 | 6′ 6″ | 2 |
| Rafter | 2×4 | 5′ 8″ | 14 |
| Fly rafter (rake) | 2×4 | 5′ 8″ | 4 |
| Lookout block (rake overhang) | 2×4 | 2 1/2″ | 16 |
| Ridge board | 2×6 | 8′ 8″ | 1 |
| Rafter tie (interior pairs, at the plates) | 2×4 | 8′ 0″ | 5 |
| Gable plate tie (flat under the first 2 rafter ties) | 2×4 | 2′ 6 3/4″ | 2 |
| Gable plate tie (flat under the first 2 rafter ties) | 2×4 | 2′ 9 3/4″ | 2 |
| Frieze block (over the eave walls, top beveled) | 2×4 | 1′ 0 1/4″ | 2 |
| Frieze block (over the eave walls, top beveled) | 2×4 | 1′ 1″ | 8 |
| Frieze block (over the eave walls, top beveled) | 2×4 | 1′ 1 3/4″ | 2 |
| Collar tie | 2×4 | 4′ 2 9/16″ | 3 |
| Center gable stud (under ridge) | 2×4 | 1′ 8 13/16″ | 2 |
| Gable end stud | 2×4 | 11 1/16″ | 4 |
| Gable end stud | 2×4 | 1′ 7 1/16″ | 4 |
| Gable corner nailer (2×4 flat on the cap plate under each end rafter) | 2×4 | 9 5/8″ | 4 |
| Gable vent sill and header (flat) | 2×4 | 2′ 6 1/2″ | 4 |
| Gable vent side stud (between sill and header) | 2×4 | 8″ | 4 |
| Fascia (eave) | 1×6 | 8′ 8″ | 2 |
| Fascia (rake; both ends plumb and parallel: 5′ 7 15/16″ along either edge, length given tip to tip) | 1×6 | 5′ 10 11/16″ | 4 |
| Corner trim (eave-wall faces) | 1×4 | 7′ 11 1/8″ | 4 |
| Corner trim (gable-wall faces) | 1×4 | 7′ 9 7/16″ | 4 |
| Door casing (sides) | 1×4 | 6′ 9 1/2″ | 2 |
| Door casing (head, between the side casings) | 1×4 | 3′ 0″ | 1 |
| Window casing (sides) | 1×4 | 3′ 0″ | 2 |
| Window casing (head and sill) | 1×4 | 2′ 7″ | 2 |
| Door stile | 1×4 | 6′ 5 1/4″ | 2 |
| Door rail | 1×4 | 2′ 4 1/2″ | 3 |
| Door Z brace (along either edge) | 1×4 | 3′ 5 3/16″ | 2 |
| Door stop (header) | 1×2 | 3′ 0″ | 1 |
| Door stop (latch side) | 1×2 | 6′ 5 1/4″ | 1 |
| Roost bar (2×4 wide side up, edges rounded) | 2×4 | 7′ 4 3/4″ | 2 |
| Roost ledger (front and back walls) | 2×4 | 2′ 5 3/4″ | 2 |
| Droppings board ledger (left wall) | 2×4 | 7′ 4 3/4″ | 1 |
| Droppings board rail (on edge, open side) | 2×4 | 7′ 4 3/4″ | 1 |
| Droppings rail cleat (front and back walls) | 2×4 | 8″ | 2 |
| Vent nailer (flat 2×4 under a vent hole) | 2×4 | 1′ 2 1/2″ | 4 |
| Vent nailer (flat 2×4 under a vent hole) | 2×4 | 1′ 0 1/4″ | 1 |
| Vent nailer (flat 2×4 under a vent hole) | 2×4 | 10 3/4″ | 1 |
| Vent nailer (flat 2×4 under a vent hole) | 2×4 | 10 1/4″ | 3 |
| Nest box arm (on edge on the rough sill, lapped on the trimmer, out under the box) | PT 2×4 | 1′ 2 1/8″ | 2 |
| Nest box sill block (on edge on the rough sill, between the arms) | 2×4 | 4′ 2 1/2″ | 1 |
| Nest box hinge rail (over the opening, between the end panels, top edge ripped at 25 deg) | 1×4 | 4′ 5 3/8″ | 1 |
| Nest box bedding lip (inside) | 1×4 | 4′ 8 1/2″ | 1 |
| Window screen frame side | 1×2 | 3′ 3″ | 2 |
| Window screen frame rail (between the sides) | 1×2 | 2′ 0″ | 2 |
| Bedding board (drops in behind the people door) | 1×8 | 3′ 3 3/4″ | 1 |
| Bedding board spacer (beside the door opening) | 1×2 | 8 1/4″ | 2 |
| Bedding board cover (over the spacer) | 1×4 | 8 1/4″ | 2 |
| Pop door guide spacer | 1×2 | 2′ 10″ | 2 |
| Pop door guide cover | 1×4 | 2′ 10″ | 2 |
| Pop door top stop | 1×2 | 1′ 5 1/4″ | 1 |
| Hen ramp, ground-contact PT (bottom end cut level) | PT 2×12 | 3′ 8 3/4″ | 1 |
| Hen ramp ledger (flat, under the pop door) | PT 2×4 | 1′ 6″ | 1 |
| Hen ramp cleat | 1×2 | 11 1/4″ | 7 |
| Ramp stringer blank (two tapered stringers from each piece) | PT 2×10 | 2′ 4″ | 3 |
| Ramp deck board | PT 2×6 | 3′ 9″ | 5 |
| Ramp ledger (on the rim joist and skid) | PT 2×4 | 3′ 9″ | 1 |
| Pad frame: back | PT 4×6 | 10′ 11″ | 1 |
| Pad frame: left and right sides | PT 4×6 | 10′ 0″ | 2 |
| Pad frame: landing front | PT 4×6 | 6′ 8″ | 1 |
| Pad frame: landing sides | PT 4×6 | 4′ 5 1/2″ | 2 |
| Pad frame: front, left of the landing | PT 4×6 | 2′ 11 1/2″ | 1 |
| Pad frame: front, right of the landing | PT 4×6 | 1′ 3 1/2″ | 1 |
Rafters. All 14 rafters and the 4 fly rafters are 5′ 8″, and two come from each 12 ft 2×4. Cut one pattern rafter with its ridge cut and birdsmouth, test it at both walls, then trace the others.
Studs and plates. The wall studs are 7′ 6″ long, so a 92 5/8 in precut stud is long enough for them. The 8′ 0″ plates and the boards that give two shorter parts are not, so the list marks how many boards per wall must be full 96 in stock.
Roosts. The two roost bars are 7′ 4 3/4″ long, 2x4s laid wide side up with the top edges rounded. They drop onto ledgers on the front and back walls, over the droppings board.
Where the waste goes
- Floor joists: each 7′ 9″ joist comes from an 8 ft pressure-treated 2×6 and leaves 3 in.
- Rafters: two 5′ 8″ pieces from each 12 ft 2×4 leave about 8 in.
- Frieze blocks: 8 of the 12 blocks over the eave walls come from the 10 ft 2x4s bought for the rafter ties.
- Small parts: the vent nailers, lookout blocks and hen ramp cleats come from offcuts, so the list buys no board for them.
- No spares: the counts include nothing for rejects. Pick straight stock at the yard, and add a 2×4 or two if you expect to cull warped boards.
Common mistakes
- Buying chicken wire. It keeps hens in but does not keep raccoons or dogs out. The list uses 1/2 in hardware cloth on every opening and for the skirt.
- Precut studs for every 8 ft line. Plates and paired parts need full 96 in boards. Check the note on each wall’s 2×4 line before you load the cart.
- Skipping the new door siding sheet. The siding cut out of the door opening is too short for the door leaf, so the list has a new T1-11 sheet for it.
- One latch per door. Raccoons learn to open a single latch. The list has a hasp and snap hooks so every door and lid has a second catch.
- Vinyl cut to the floor only. The sheet vinyl is 12 ft wide x 10 ft so one piece covers the floor and runs 12 in up the walls, where wet bedding would otherwise reach the wood.
- Untreated wood near the ground. Plain framing lumber under the floor rots, so keep skids, rims, joists and both ramps pressure treated. The USDA Wood Handbook explains why wet, untreated wood decays.
Before you order
Rules for keeping hens (how many, roosters, distance to property lines and houses) and for small buildings vary by town and HOA. Check your local rules for keeping hens and check your local permit office before you buy lumber or birds. The shed permit checklist lists the questions to ask.
The pad is the first job. The gravel shed foundation guide shows how to build one, and shed ventilation explains why high vents move damp air out. To compare the coop shell with a storage shed on the same footprint, see the 8×8 shed material list.
Get the full plan
The 8×8 walk-in chicken coop plan is a 3DSHEDPLANS PDF with this material list, the cut list and step-by-step 3D drawings from the gravel pad to the skirt. Download the free 8×8 walk-in coop preview PDF to see the format before you buy.
Looking at other coops? The chicken coop plans page lists every coop plan with its hen count. For a storage building, see the gable shed plans.
Frequently asked questions
How many 2x4s do I need for an 8×8 chicken coop?
78 framing 2x4s: 58 at 8 ft, 6 at 10 ft, 11 at 12 ft and 3 at 14 ft. Add 16 2×4 x 12 ft temporary braces you reuse later, 5 more 8 ft 2x4s for brace stakes and deck cleats, and 3 pressure-treated 2x4s for the nest box arms, hen ramp ledger and ramp ledger.
How many sheets of plywood, OSB and T1-11 for an 8×8 coop?
10 sheets of 5/8 in T1-11 (eight for the walls, one for the gables, one for the door), 5 sheets of 7/16 in OSB for the roof and 7 sheets of plywood: 2 for the floor, 2 for the nest boxes and droppings board, 2 for the soffit and 1 for the kick band.
How much hardware cloth does an 8×8 chicken coop need?
5 rolls of 1/2 in galvanized welded hardware cloth, 19 gauge, 36 in x 10 ft. That covers every vent hole, both gable vents, the window screen and the skirt around the base. The list adds 360 pan-head screws with fender washers and 50 landscape staples to hold it.
How many bundles of shingles does an 8×8 coop roof take?
4 bundles of 3-tab shingles, including the starter strips and the ridge cap, for a 6/12 gable roof with 12 in eaves and 4 in rakes. Under them go 5 sheets of OSB, 1 roll of 15 lb felt and 6 pieces of drip edge.
Are free 8×8 chicken coop plans with a material list available?
This page is a free material list for the 8×8 walk-in coop. The free preview PDF shows the plan's drawings and build stages, and the paid plan PDF has the same printable list with the cut list and every step drawn.
Shed building guides
- 4×8 Shed Material List: Lumber, Sheets, Hardware
- 4×6 Lean-To Shed Material List: Lumber, Sheets, Hardware
- 16×20 Lean-To Shed Material List: Lumber, Sheets, Hardware
- 16×16 Shed Material List: Lumber, Sheets and Hardware
- How to Insulate a Shed: Walls, Roof and Floor
- 10×18 Shed Material List: Lumber, Sheets and Hardware