
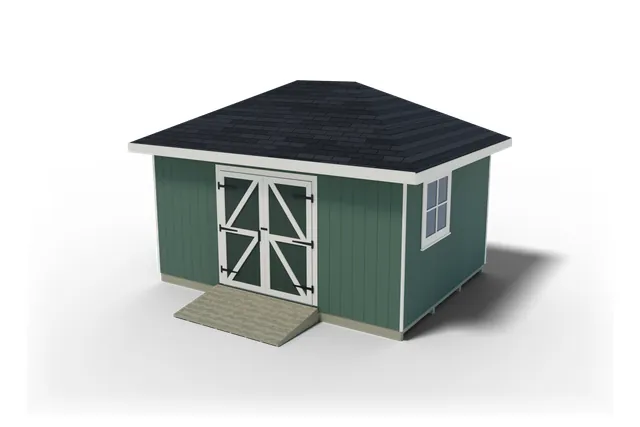
Hip roof · 192 sq ft
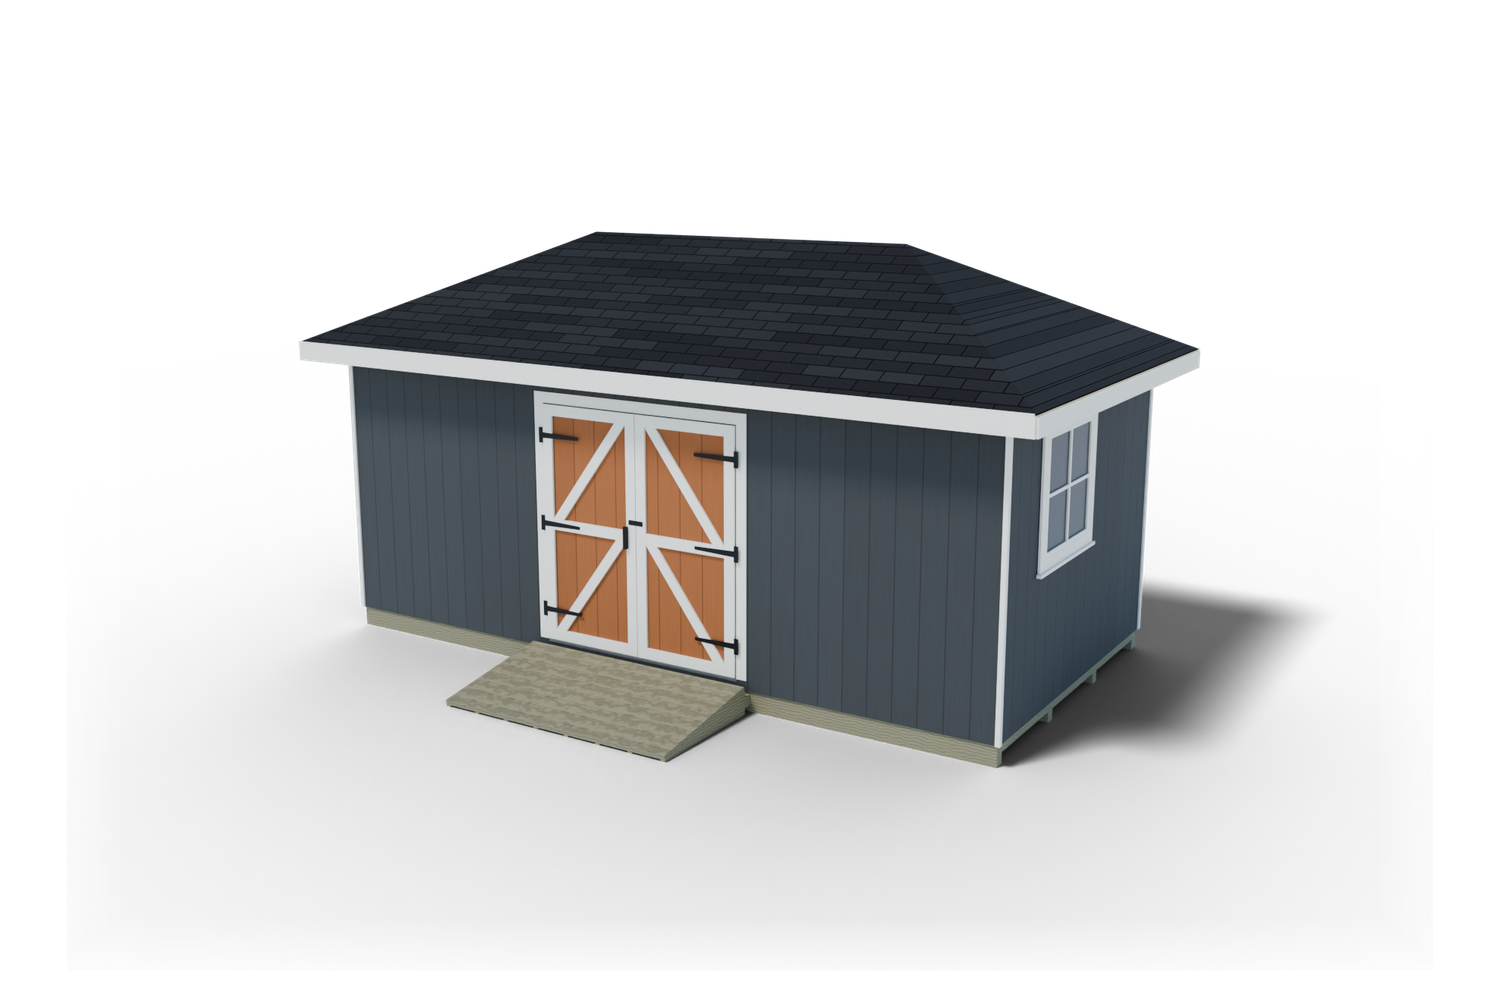
Hip roof · 200 sq ft
10x20 Hip Roof Shed Plan
Build this 10x20 hip roof shed yourself. Every board, cut and step, drawn in 3D across 73 pages.
$19.99
$29.99−33%
- 30-day money-back guarantee
- PDF by email right after checkout
- Visa, Mastercard, Amex, PayPal
- Full material and shopping list
- Cut list with every length
- Step-by-step 3D views, 73 pages
- Phone, tablet, PC and Mac
As seen on
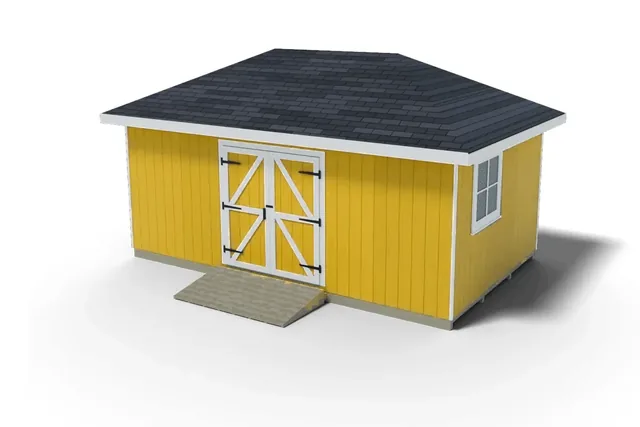
This 10x20 hip roof shed plan from 3DSHEDPLANS builds a 200 sq ft storage shed, 20 ft wide by 10 ft deep, with a 6 ft double door, a ramp, a window in each end wall and a 6/12 roof with 12 inch eaves all round. The 73-page PDF has 19 step sections.
Get the full plan PDF for $19.99 or download the free preview
What builders say
We aren't DIY-savvy and needed something simple. The plan was extremely well laid out and easy to follow.
A year ago I had only built flat-pack furniture. The plans are simple to follow, and you don't need years of experience.
The illustrations are fantastic, and the shopping list helped me buy the right materials. It took me five days to build my shed.
The full plan is $19.99: buy the 10×20 hip roof shed plan. To see the drawing style first, open the free 10×20 hip roof shed plan PDF.
10×20 hip roof shed plan: the numbers for a site check
| Check | 10×20 Hip Roof Shed |
|---|---|
| Walls | 20′ 0″ wide x 10′ 0″ deep, 200 sq ft of floor |
| Roof footprint with overhangs | 22′ 1 1/2″ x 12′ 1 1/2″ to the fascia faces (1′ 0″ eaves on all four sides) |
| Gravel pad | 22′ 0″ x 12′ 0″ inside a pressure-treated 4×6 frame, 4″ of 3/4″ stone (4.7 cu yd loose, with the landing in front of the door) |
| Floor height | Top of the deck 9 3/4″ above the ground |
| Wall height | 7′ 10 1/2″ (7′ 6″ studs), top of the walls 8′ 8 1/4″ above the ground |
| Overall height | 11′ 5 5/16″ above the ground, top of the ridge shingles |
| Roof | Hip, 6/12 (26.6 degrees), 2×6 ridge 10′ 1 1/2″ long, 2×4 commons and jacks, 2×6 hips |
| Door rough opening | 6′ 0″ wide x 6′ 4 1/2″ tall, double door centered in the 20 ft front wall, swings out |
| Window rough openings | 2, each 36″ x 36″, one in each 10 ft end wall toward the front |
| Roof vents | 2 static louvers near the top of the back plane, plus a 1/4″ screened gap under the soffit |
| Ramp | Detachable pressure-treated ramp, 6′ 9″ wide, 3′ 6″ out, 1:6 slope |
| Crew and time | Two people, about 80 hours |
A hip roof overhangs all four walls, so stake out the 22′ 1 1/2″ x 12′ 1 1/2″ roof outline on your lot, not just the walls, and leave room to walk around it with a ladder. The ramp and landing reach 7′ 2 1/2″ out from the front wall, and the plan’s fit page says to keep 10′ 0″ clear and level in front of the wall (the ramp and one mower length) if you need to line up a tractor.
How the 10×20 hip roof shed plan goes together
| Stage | What the plan uses | Time for two |
|---|---|---|
| Site and foundation | Compacted gravel pad in a 4×6 frame, four 20 ft pressure-treated 4×4 skids, each spliced from two boards | 7 h |
| Floor frame and deck | Pressure-treated 2×6 joists 16″ on center, 3/4″ tongue and groove plywood | 8 h |
| Walls | 2×4 studs 16″ on center or closer, raised as bare frames (the long walls in two sections), then sided with 5/8″ T1-11 | 20 h |
| Roof framing | 2×6 ridge on two temporary posts, 2×4 commons and jacks, 2×6 hips, rafter ties, king tie | 13 h |
| Sheathing and roofing | 7/16″ OSB, drip edge, 15 lb felt, 2 roof vents and 3-tab asphalt shingles | 17 h |
| Door, windows and trim | T1-11 double door, 2 prefabricated windows, fascia, sloped soffit, 1×4 trim, paint | 15 h |
The plan runs in a fixed order: preparation and ground breaking (step 9), skids (10), floor frame (11), decking (12), anchoring the shed (13), the four walls (14 to 17), joining them (18), the door (19), the roof framing plan (20), commons and ridge (21), hips (22), jacks (23), fascia and soffit (24), sheathing, vents and shingles (25), trim, windows and finish (26) and the ramp (27). Section 28 covers weather, snow and upkeep, and a printable checklist lists each stage with a “date done” column.
Site layout, gravel pad and skids
Stake the corners 20′ 0″ along the front and 10′ 0″ along the sides, and move one stake until both diagonals read 22′ 4 5/16″. The plan has you dig 4″ deep over a 22′ 11″ x 12′ 11″ area, the outside of the pad frame, and on out in front of the door for the ramp and a 3 ft landing: 9′ 8″ wide, centered on the door, reaching 7′ 2 1/2″ out from the front wall. Digging moves the stakes, so set them again and recheck. On a sloped yard the plan shows how to measure the fall with a string and line level first, and when to build the stone up or dig the high side down.
The frame is pressure-treated 4x6s laid flat, rated for ground contact (UC4A or higher), on a 1/2″ stone bed so it finishes level with the lawn. Its inside is the 22′ 0″ x 12′ 0″ pad plus a landing 8′ 9″ wide that reaches 5′ 9″ past the front of the pad. The back is two 11′ 5 1/2″ pieces butted end to end. Square it until both pad diagonals read 25′ 0 3/4″, join each corner with 2 galvanized 10″ timber spikes, pin it with 32 rebar stakes, then fill it with 4″ of 3/4″ crushed stone compacted in two layers.
Four ground-contact pressure-treated 4×4 skids run along the 20 ft side, the outer two flush with the floor edges and the others 3′ 2 13/16″ on center. A 20 ft skid is longer than a 16 ft board, so each one is spliced from an 8 ft and a 12 ft board, butted on the gravel under a floor joist. The joints alternate end to end from skid to skid, so no two sit side by side, and each joint gets a 3 ft pressure-treated 2×4 scab on both sides with six nails per scab. Each skid goes in crown up and is leveled along its length and against the others, with gravel or treated shims under a low one, never untreated wood.
Floor frame and decking
The floor frame is sixteen 9′ 9″ joists between two 20′ 0″ rims, all pressure-treated 2×6, at 16″ on center. Clamp the rims together and mark both at once from the building’s left end: a joist flush at each end, then lines at 15 1/4″, 31 1/4″, 47 1/4″ and every 16″ after. The rafter marks later start from the same corner. Each rim is spliced too, 9′ 4 3/4″ plus 10′ 7 1/4″, and both rims break over a doubled joist, so the list adds one extra joist for that spot.
Once nailed the frame weighs about 450 lb and racks out of square if you lift it, so you build it in place on the skids, push it until both diagonals read 22′ 4 5/16″, then toe-nail it down. A framing angle goes at every joist-to-skid crossing, 68 in all, with 8 connector nails each.
Eight sheets of 3/4″ tongue and groove plywood cover the deck in three rows, cut to a lettered map (pieces A to I) so the end joints are staggered and land on joists. Two full rows cover about 7′ 11″, and the last row is 2′ 1″ wide, ripped from full sheets. Because that narrow row still flexes at its end joints, the plan adds flat 2×4 blocks between the joists under the seam 7′ 11″ from the front edge, and both sheet edges screw down to them.
Anchoring the shed before the walls go up
The plan figures that, empty, this 11′ 5 5/16″ tall shed on loose skids slides at about 11 psf of wind (gusts near 55 mph) and tips at about 19 psf, and that the bare walls catch that wind for days before the roof is on. So in step 13, right after the deck, you set 8 screw-in auger ground anchors, 30″ or longer, with galvanized straps, 4 along each outside skid. Measured from the left end, the front skid’s anchors sit at 1′ 0″, 6′ 3″, 13′ 0″ and 19′ 0″, and the back skid’s at 1′ 0″, 7′ 0″, 13′ 9″ and 19′ 0″, each one clear of the splice scabs.
An auger will not start in 4″ of compacted stone, so you dig the stone back to the soil at each spot, turn the anchor in with a steel bar through its eye in half turns, and rake the stone back. Each strap runs up the skid’s outside face onto the rim, fastened with 1 1/2″ structural screws, 4 into the skid and 2 into the rim, and ends far enough below the deck that the siding covers it. The front anchor at 13′ 0″ sits behind the ramp, and the ramp ledger later screws on beside its strap. Check your local permit office for what your area asks.
Walls: framing order and lift weights
Each wall is framed flat on the deck, checked by its diagonals and raised as a bare frame. The 20 ft walls are framed and raised in two sections, so two people can lift each one. The siding goes on after all four walls stand.
| Order | Wall | Studs at 7′ 6″ | Bare frame weight |
|---|---|---|---|
| 1 | Back wall, 20 ft, no openings, 2 sections | 19 (including 2 corner backers and 2 joint studs) | About 130 lb and 110 lb |
| 2 | Front wall with the door, 2 sections | 17 (including 2 kings, 2 corner backers and 2 joint studs, plus 2 trimmers and 4 cripples) | About 190 lb (the heaviest lift) and 80 lb |
| 3 | Left wall with a window | 8 (including 2 kings) | About 150 lb |
| 4 | Right wall with a window | 8 (including 2 kings) | About 150 lb |
- Anchors first. The 8 ground anchors go in at step 13, before any wall goes up, so every wall you raise stands on a floor that cannot slide.
- Sections that meet on a joint stud. The back wall breaks 10′ 7 1/4″ from its right corner and the front wall 14′ 0 3/4″ from its left corner. Each section has its own plates and a joint stud at the end that meets the next. You clamp the two joint studs flush and nail them every 12″. The 19′ 5″ second top plate goes on later and laps every section joint by at least 4′ 0″.
- Stop blocks at the edge. Two 12″ 2×4 offcuts nailed to the rim, 2″ above the deck, keep each bottom plate from kicking out over the edge as it tips up.
- Nobody in front. A wall that goes past plumb falls outward, off the deck, so nobody stands on the ground in front of it. Pick a calm day and brace it at once, from the outside, to stakes about 5 ft out.
- Side walls drop in. Their plates are 9′ 4 3/4″, 1/4″ shorter than the gap between the front and back walls, so plumb those first. The gap stays at the back corners and gets a shim at each screw.
Wall diagonals are 13′ 1 5/8″ and 12′ 2 1/8″ for the two back wall sections, 16′ 0 11/16″ and 9′ 9 1/8″ for the two front wall sections, and 12′ 2 1/8″ for each side wall. The corners are screwed from inside with 3″ exterior screws every 12″. Each T1-11 sheet (about 60 lb) stands on a 2×4 ledger while your helper holds it plumb, and each wall’s plumb braces move inside and come off as soon as that wall is sided.
Door and windows: sizes and positions
The door opening is 6′ 0″ wide and 6′ 4 1/2″ tall, from 7′ 0″ to 13′ 0″ measured from the left corner, so it sits centered with 7′ 0″ of wall each side. It sits under two 6′ 3″ 2x8s with 1/2″ plywood between them. Once the bottom plate is cut out the framed height is 6′ 6″, with 6′ 5 1/4″ clear under the head stop.
The two leaves come from two new T1-11 sheets, because the cut-out is too short. Each is 2′ 11 5/8″ wide and 6′ 5 1/4″ tall, with a glued and screwed 1×4 frame (two 6′ 5 1/4″ stiles, three 2′ 4 5/8″ rails) and two Z braces, 3′ 5 5/16″ along either edge, cut with the miter saw at 36 degrees. Three T-strap hinges hang each leaf on 1/4″ carriage bolts with the nuts inside, so nobody can unscrew the door from outside. The left leaf is active, with the latch on the middle rail 3′ 3 1/8″ above the deck; the right leaf closes on two barrel bolts and carries the 1×2 astragal. Brush sweeps (2′ 11 1/16″ and 2′ 10 13/16″) close the gap under the leaves, and an aluminum threshold cap, cut to 6′ 0″, covers the deck edge with no threshold board, so wheels roll straight in. A 6″ hook and eye, 36″ above the deck, holds each open leaf against the front wall in wind.
The windows are prefabricated units for 36″ x 36″ rough openings, one in each 10 ft end wall toward the front: 1′ 11″ to 4′ 11″ from the front end of the right wall’s plate, and 4′ 5 3/4″ to 7′ 5 3/4″ from the back end of the left wall’s 9′ 4 3/4″ plate, which puts both 23″ from the front end of the plate. Each sill top is 3′ 6″ above the bottom plate, under a header of two 3′ 3″ 2x6s with plywood between. Each opening is wrapped with flashing tape and gets a drip cap over its head casing.
What is on the 10×20 hip roof shed material list
The shopping list is split by section, so you can buy the base first and the roof later:
| Section | Main items and counts |
|---|---|
| Foundation and floor | 4 pressure-treated 4×4 x 8 ft and 4 x 12 ft for the spliced skids, 2 pressure-treated 2×4 x 14 ft for the 8 splice scabs, 19 pressure-treated 2×6 x 10 ft and 2 x 12 ft for the joists and rims, 8 sheets of 3/4″ tongue and groove plywood, 4.7 cu yd of stone, the pad frame (1 eight-foot, 2 twelve-foot and 4 sixteen-foot pressure-treated 4x6s) with 32 rebar stakes and 16 timber spikes |
| Walls | 2×4 plates and studs for four walls, a doubled 2×8 door header, two doubled 2×6 window headers, 16 sheets of 5/8″ T1-11 |
| Roof framing | 20 commons, a 2×6 ridge on a 12 ft board, 4 2×6 hips, 24 jacks, 9 rafter ties, two king tie pieces, two temporary 12 ft 2×4 ridge posts with 4 braces |
| Roof covering | 16 sheets of 7/16″ OSB (15 plus 1 spare), 2 static roof vents, 2 rolls of 15 lb felt, 14 bundles of 3-tab shingles (starter and caps included), 8 pieces of drip edge |
| Fascia, door, windows and trim | 4 1×6 x 12 ft and 2 1×6 x 14 ft for the fascia, 4 sheets of 1/2″ plywood for the soffit, 2 new T1-11 sheets for the leaves, 6 T-strap hinges, a handle and latch, 2 barrel bolts, 2 sweeps, 2 hold-open hooks, a threshold cap, 2 prefabricated windows, 1×4 casing and corner trim |
| Ramp | 2 pressure-treated 2×10 x 8 ft for the stringers, 4 pressure-treated 2×6 x 14 ft for the 8 deck boards, a pressure-treated 2×4 ledger and filler, 2 hook-and-eye latches, 4 rolls of grit tape |
| Hardware and finish | 33 lb of 16d framing nails, siding, sheathing and roofing nails, 48 hurricane ties (skewable ones at the hip corners), 68 framing angles, 4 strap ties plus a splice strap, 8 ground anchors with 48 structural screws, 10 tubes of adhesive, roofing cement, flashing tape, insect screen, 6 gallons of paint |
The list also counts the temporary pieces people forget: 18 wall braces, 4 ridge post braces, the brace stakes, the deck cleats and the decking seam blocks. That is why the lumber yard order at the end, which adds every section into one list for the counter, shows more 2x4s than the section lists (73 eight-footers and 38 twelve-footers). It suggests 2 or 3 spare studs for bad boards on top.
Cut list and cutting plan
The cut list gives every part’s lumber, length and count: skids and rims at 20′ 0″ overall, joists at 9′ 9″, studs at 7′ 6″, the ridge at 10′ 1 1/2″, commons at a 6′ 9 7/16″ board, hips at a 9′ 0 13/16″ board, jacks at 2′ 7 9/16″, 4′ 0 3/8″ and 5′ 5 1/8″, tail jacks at 1′ 2 13/16″ and rafter ties at 10′ 0″. Trim, door, ramp and pad frame parts are on it too, and every spliced part lists both pieces.
The cutting plan says which board each part comes from and what is left. Two commons come out of each 14 ft 2×4, four short jacks out of each 12 ft 2×4, two middle jacks out of each 10 ft and two long jacks out of each 12 ft. The 8 tail jacks cost no extra boards, since they come from the window sill and rafter tie offcuts. The roof sheathing has its own plan: 15 sheets cut to a lettered map, the small pieces from the big pieces’ offcuts, plus 1 spare kept whole.
Why the 10×20 hip roof has a long ridge on two posts
On a square shed the four hips meet at one point. This shed is 20 ft wide and 10 ft deep, so the roof planes on the 20 ft walls run up to a ridge instead: a 2×6, 10′ 1 1/2″ long, its ends 4′ 11 1/4″ in from the outside of each end wall. The two long planes are trapezoids and the two end planes are triangles, all at 6/12.
The commons sit 1′ 3″ apart, from 5′ 0″ to 15′ 0″ from the corner along the front and back walls, so the ridge carries nine pairs, plus a king common at the middle of each end wall. Jacks sit at 1′ 3″, 2′ 6″ and 3′ 9″ from every corner, so the bays along each wall are equal, about 15″ rather than 16″, and every sheathing joint still lands on a rafter.
A ridge this long gets two temporary posts, one about 12″ in from each end. Each 10′ 1 5/16″ 2×4 post stands on the deck on the shed’s center line, braced both ways with 2 braces to cleats screwed to the deck. A 12″ cleat on the back of each post stands 4″ above its top, and the ridge sits on the posts tight to the cleats with three screws through each.
How the 10×20 hip roof is framed: ridge, commons, hips and jacks
The plan frames the roof in a fixed order and says who stands where:
- Ridge on two posts. The ridge (about 20 lb) goes up with one person at each end, each on an 8 ft step ladder on the deck beside a post, no higher than the third step from the top. Its top sits 2′ 8 5/16″ above the plates and 10′ 6 13/16″ above the deck, a little above eye level from there. Each person screws their own end to the cleat.
- Commons in pairs. Cut a pattern common (board 6′ 9 7/16″, top edge 6′ 7 11/16″, seat 2 1/2″, heel 1 1/4″, a notch 32% of the depth), test it on both sides of the ridge, then cut 20: 18 for the front and back and 2 kings. Set the pairs at both ridge ends first, check the ridge for level and center, then fill in one each side so it stays straight. Each common weighs about 9 lb; one person on the ladder by the ridge nails the top, the other on a step ladder at the wall sets the seat. The plate is 7′ 10 1/2″ above the deck, so never set or nail a seat from the deck.
- Ties and kings. A 2×4 rafter tie, 10′ 0″, goes on the right face of each pair, 9 in all, with its top corners clipped so it stays under the sheathing. The two king commons butt the ridge ends and are toe-nailed to them.
- Four hips. Each 2×6 hip runs at 45 degrees in plan from a corner to a ridge end, sloping 19.5 degrees, top edge 1′ 6″ of tail plus 7′ 4 7/8″. Its seat drops 1/4″ so its top corners stay in the roof planes, its top is 2 3/8″ above the plate, both ends get double 45 degree cheek cuts, and the tail is ripped 2 1/16″. A strap tie goes across the lapped plates at each corner first. Two people set each hip (about 18 lb): one beside the ridge end holds the V point in the corner between the end common and the king, the other inside the wall corner sets the seat.
- Jacks, then the posts come out. 24 jacks, centered 1′ 3″, 2′ 6″ and 3′ 9″ from every corner, each about 1′ 4 3/4″ longer than the one before, with 45 degree side cuts in two hands, 4 of each per length. Nail them in pairs either side of a hip, then back out the cleat screws and take the posts out. Eight tail jacks fill the eave between each hip tail and the first jack.
- King tie. With the posts out, a 2×4 on edge runs from king to king on top of the rafter ties, in two pieces (9′ 4 1/4″ and 9′ 1 1/4″) that butt over the middle tie 10′ 1 1/2″ from the left corner and are joined with a 24″ strap. The rafter ties hold the long walls; this holds the end walls.
The hip seat notch is 3 7/16″ of a 5 13/16″ plumb depth, 59%, far past the one-third the commons keep. The plan explains in step 22.4 that the seat sits right over the lapped plates at the corner, so the notch carries no bending, and the tie, toe-nails and strap hold it. Do not cut it deeper than drawn. Our hip roof shed framing guide walks through the same sequence in more detail.
Fascia, soffit, sheathing and shingles on a hip roof
A hip roof has eaves on all four sides and no rakes. The front and back fascia each run 22′ 1 1/2″ long point to long point, made from two 11′ 0 3/4″ pieces joined with a 45 degree scarf centered on the rafter tail 10′ 0″ from the left corner. Each end fascia is 12′ 1 1/2″, also two pieces (6′ 0 3/4″ each) scarfed over the tail 5′ 0″ from the front corner. All four miter at 45 degrees over the hip tails. The 10 plywood soffit strips are 1′ 0 7/16″ wide, ripped from 4 sheets, and slope with the rafter tails. They meet at the corners on a cut line at 48.2 degrees to the strip’s edge, not 45, because they are sloped.
The roof is about 295 sq ft. Each long plane is cut from five pieces (A to E) and each end from three (F, G and H up to the point), and the back and second end are mirror images. Every end joint lands on a rafter center. The drip edge goes on all four eaves before the felt, folded around each corner, and the felt runs from the eaves up with 2″ head laps and 4″ end laps, wrapping 6″ over each hip and the ridge. This roof takes 2 rolls.
Shingles run 16 courses up each plane at 5″ exposure, over a starter strip on all four eaves. Where a course meets a hip, let it run past, snap a line along the hip and cut it off from the top. About 112 cap pieces, cut three to a shingle from 38 shingles, cover the hips from the eaves up, and the ridge is capped last, starting at the end away from the prevailing wind, so its first pieces lap over the hip caps. Total: 14 bundles.
Roof ventilation on this plan
A hip roof has no gable wall for a high vent, so this plan uses two kinds. Air comes in through a 1/4″ gap at the siding under the soffit, backed with insect screen, around all four eaves. It leaves through 2 static slant-back louvers, rated 60 sq in of net free area or more, near the top of the back plane, where they face away from the door.
The plan places them in numbers. Counting the back commons from the left end, one vent goes in the bay between the 2nd and 3rd commons (6′ 10 1/2″ from the left end wall to the bay center) and one between the 6th and 7th (11′ 10 1/2″). In each bay you drill a 1/4″ locator hole 1′ 9″ down from the top of the ridge from inside, then cut the hole from the roof. The bays are 1′ 1 1/2″ clear, so no rafter is cut. Each louver’s lower flange sits on top of the shingles below, and the courses above lap over its top and sides.
The plan also prints its arithmetic. It uses a common attic rule of thumb, which it says is not a shed requirement: floor area divided by 150, here 192 sq in, about half low and half high. The two louvers give 120 sq in high. The soffit gap gives about 90 sq in low once the screen is counted, 6 sq in short of that half. In total that is 210 sq in. That suits unheated storage. If you plan to heat or insulate the shed, the plan says to ask your local permit office what it wants.
What you can fit in a 10×20 hip roof shed
The plan’s “What fits inside” page draws the room from above, 19′ 5″ across and 9′ 5″ deep inside, with 7′ 7 1/2″ of clear height under the top plates:
- A 42″ deck riding mower, nose in. With both leaves open the door is about 5′ 11 1/2″ clear, so a 42″ deck (4′ 7 3/16″ wide) clears each side by 8 1/8″. The plan adds that a 48″ deck fits with its deflector raised and a 54″ deck does not. Measure your own mower before you buy.
- Parked against the back wall. The plan parks the mower’s nose about 1″ off the back wall, between the shelf runs, which leaves about 3′ 6″ of cross aisle behind its tail.
- A wheelbarrow and two bikes. The drawing also places a wheelbarrow (2′ 2″ x 5′ 0″) and two bikes with their handlebars staggered (2′ 6″ x 5′ 10″) beside the mower.
- Back-wall shelves, yours to add. There is room for 12″ deep shelves on the back wall in 2 ft runs. They are not on the shopping list.
- A ramp. The deck sits 9 3/4″ above the gravel, so wheels need the ramp from step 27: 6′ 9″ wide, 3′ 6″ out at 1:6 (9 degrees), eight stringers 11 3/8″ on center under eight 2×6 boards. Its top sits about 13/16″ below the deck, and the leaf swings out over it with 1 1/4″ to spare. Set the mower deck to its highest cut before you take it up. Our guide on how to build a shed ramp covers the idea in general.
- Headroom under the ties. The rafter ties sit on the plates, 7′ 10 1/2″ above the floor, and the king tie stands on them. Above them the roof is open to the ridge.
Hip roof on a 10×20 shed: what it costs you and what it gives
A hip roof takes more cutting than a gable roof: four hips with double cheek cuts and a deep seat, 24 jacks in three lengths and two hands, 8 tail jacks, and soffit corners cut at 48.2 degrees. It also covers more roof, about 295 sq ft here under 16 OSB sheets and 14 bundles, because the eave runs around all four sides. The roof framing alone is about 13 hours for two, and the sheathing, felt and shingles another 17.
In return there are no gable triangles to frame and side, no rakes, and an eave over every wall that keeps rain off the siding on all four sides. The roof also tops out at 11′ 5 5/16″, only about 2′ 9″ above the 8′ 8 1/4″ top of the walls, which helps where neighbors look at it. A hip roof generally holds up to wind better than a gable roof, according to the Building America Solution Center guide to hip vs gable roofs. If you would rather frame two flat gable ends, the 10×20 gable shed plan builds on the same footprint, and the 10×20 lean-to shed plan has a single slope.
Tools, ladders and fasteners the plan lists
Beyond a circular saw with a rip guide, a speed square, a framing square, a drill/driver and a framing hammer, the tool list adds:
- a miter saw for the door braces (set to 36 degrees) and the trim
- a reciprocating saw or oscillating tool for flush cuts at the threshold and the window openings
- a jigsaw and a drill with a 1/4″ bit for the roof vent holes and their locator holes
- a 3 lb sledge for the pad frame spikes and stakes, and two 24″ bar clamps for marking the rims together
- a 4 ft level, an 8 ft straight board, a string line with a line level and a hand tamper
- a steel bar or pipe, about 3/4″ x 3 ft, for turning the ground anchors
- two 8 ft step ladders, which reach the ridge, and a 16 ft extension ladder for roof work from the eave, about 8′ 8″ up
The fastener schedule gives the nail and count for every joint, from three 16d nails per joist at the rims to three nails through the side cut of every jack and eight clinched nails at each king tie end. The list counts 33 lb of 16d framing nails, about 1196 nails plus 10%. For roof work the plan has you screw a 2×4 foot stop through the sheathing into four or more rafters before you work above it, and never to work on the roof alone.
Free 10×20 hip roof shed plan PDF vs the full plan
The free PDF is an 8-page streamlined version: the five stages (site and foundation, floor, walls, roof, trim and paint) with 3D views and framing previews. It has no material list, no cut list and no measurements.
The full 73-page plan adds every step, the roof framing plan with each rafter center, the ridge and post details, the hip and jack cut marks, the sheathing map, the vent layout, the ramp, the “What fits inside” page, the shopping list and the cut list. It also lists the 105 checks it passed, from framing that closes to sheets and shingles that cover every surface.
Before you build a 10×20 hip roof shed
- Permits. At 200 sq ft and 11′ 5 5/16″ tall, this shed is past the size some towns let you build without asking, and some towns and HOAs cap height or set setbacks. Rules vary, so check your local permit office before you buy lumber, and use our shed permit checklist to know what to ask. Call 811 a few working days before you dig.
- Snow and wind. The plan uses common small-shed framing. In heavy snow or high-wind areas, ask your local permit office about rafter size, spacing and anchors before you build.
- Skids. Use ground-contact rated pressure-treated 4x4s (UC4A or higher), and keep the splice joints where the plan puts them. Our gravel shed foundation guide covers the pad in more depth.
- Safety. Raise each wall section with two people, set the ridge and first commons with a helper, stand each ladder on firm, flat footing, stay off open rafters until the sheathing is on, keep ladders and sheets 10 ft from overhead power lines and never work on the roof alone.
- Materials. Store lumber flat and covered, since wet wood decays faster (USDA Forest Products Laboratory Wood Handbook). Check the stamp on each OSB sheet for its span rating (APA: OSB).
- Upkeep. Keep 6″ or more between the siding and the soil, keep the drip edges clear, and every spring check for lifted shingles, re-caulk the trim and make sure the skids are still level and dry.
Related plans
- Same size with a different roof: the 10×20 gable shed plan, or a single slope, the 10×20 lean-to shed plan.
- 4 ft narrower with the same 10 ft end walls: the 10×16 hip roof shed plan.
- 2 ft deeper on the same 20 ft front: the 12×20 hip roof shed plan.
- Every hip roof shed plan in one place, or browse all shed plans.
Shed building guides
- 6×12 Firewood Shed Material List: Lumber, Slats, Hardware
- 4×10 Firewood Shed Material List: Lumber, Slats, Hardware
- 8×16 Firewood Shed Material List: Lumber, Slats, Hardware
- 4×8 Firewood Shed Material List: Lumber, Slats, Hardware
- 4×16 Firewood Shed Material List: Lumber, Slats, Hardware
- 4×12 Firewood Shed Material List: Lumber, Slats, Hardware
Frequently asked questions
How big is the 10×20 hip roof shed?
The walls are 20 ft wide by 10 ft deep, 200 sq ft of floor. With 12 inch eaves on all four sides the roof covers 22 ft 1 1/2 in by 12 ft 1 1/2 in to the fascia faces. The ridge shingles top out 11 ft 5 5/16 in above the ground.
Does the 10×20 hip roof have a ridge?
Yes. Because the shed is 10 ft longer than it is deep, the four hips meet the two ends of a 10 ft 1 1/2 in 2×6 ridge. While you frame, it sits on two temporary 2×4 posts, each about 12 in in from a ridge end, braced both ways to the deck.
What is on the 10×20 hip roof shed material list?
Every item with its quantity, by section: eight pressure-treated 4×4 boards for four spliced 20 ft skids, 21 pressure-treated 2x6s for the floor, 8 floor sheets, 18 T1-11 sheets, 20 commons, 4 2×6 hips, 24 jacks, 16 OSB sheets, 2 roof vents, 14 shingle bundles, 2 windows, 48 hurricane ties, 8 ground anchors and the ramp lumber.
How long does it take to build the 10×20 hip roof shed?
The plan estimates about 80 hours for two people: 7 for the site and foundation, 8 for the floor, 20 for the walls, 13 for the roof framing, 17 for sheathing, felt and shingles and 15 for the door, windows, trim and paint.
Will a riding mower fit in the 10×20 hip roof shed?
The plan's fit drawing parks a 42 inch deck rider nose in. With both leaves open the door is about 5 ft 11 1/2 in clear, so a 4 ft 7 3/16 in wide deck clears each side by about 8 1/8 in. A 54 inch deck does not fit. Measure yours.
How is the 10×20 hip roof shed vented?
Air comes in through a 1/4 in screened gap under the soffit on all four eaves and leaves through 2 static louver vents, 60 sq in each or more, near the top of the back roof plane. The plan says this suits unheated storage; for a heated or insulated shed, ask your local permit office.
More about the 10×20 hip roof shed plan
Build Your Own 10×20 Hip Roof Storage Shed With Ease!
A Hip Roof Shed, as the name implies, looks classy and at the same time can you give your garden or lawn extra space to store your supplies or hardware. Besides, if you are a hobbyist and you want your very own personal space to work, then having a 10×20 Hip Roof Storage Shed is probably the best idea! So wait no more – order now and start building today…
Shed Plan Includes:
A Full-Fledge Material List with Required Quantity
The materials you use to build a shed are the secrets to your success. Unfortunately, most plans out there won’t precisely tell you what to buy and in what quantity. In fact, they would lure you to buy products from the plan-sellers. Luckily, we have a completely different motto. We want you to succeed in building your dream shed. And for that, we understand how important it is to get the right materials.
Our 10×20 Hip Roof Storage Shed Plan comes with an all-inclusive list of materials, hardware and tools that you would need to build the shed. Nothing more, nothing less! No click baits! You get a printable list of materials that you can take to the hardware store.
Shed Plan Includes:
Simple, Easy to Understand Step by Step Instructions
Who would have ever thought to get their hands on a shed plan that would take them through the entire process with such ease! Our 10×20 Hip Roof Storage Shed Plan comes with easy to understand, step by step instructions for DIY newbies. Don’t worry if you don’t have any experience in building wooden structures. The plan takes you through it in plain words, without jargon. Right from building the foundation to the walls and even the roofing, we have everything covered for you.
Shed Plan Includes:
3D Rendered Images for Reality Check
2D images are a thing of the past! Our 10×20 Hip Roof Storage Shed Plan comes with 3D rendered images, which means you get to see every corner, every angle and every inch clearly as if it is being right in front of you by a professional. You won’t have to scratch your head thinking how the shed should from the front, back or the sides. Even the rooftops are visualized in 3D for better understanding.
Building Your Own Shed vs. Getting Professional Help
1st Reason
You Save What a Builder Would Charge
Probably the most important reason for building your own shed is that you save money. A builder charges for labor on top of the materials, for work you can do yourself. With our 10×20 Hip Roof Storage Shed Plan, you get clear instructions, material lists and diagrams to go through the process easily.
2nd Reason
Choose Your Own Design and Make Your Dream Come True
Don’t fall for the marketing gimmicks of most professionals out there. When you start building your own shed, the world is out there for you to explore. With our material list and instructions, you will realize that you can build your dream shed without any design restrictions. The plan is simple yet it gives you the liberty to add in your own flavor!
3rd Reason
You Will Reclaim Your House Again
Our 10×20 Hip Roof Storage Shed has 120 sq ft of floor for your storage. Whether you garden or play sports, you can use the shed to keep all sorts of your equipment and tools. Besides, the shed will add an exquisiteness to your garden while fulfilling its purpose.
All the Other Reasons
This Is Exactly What You’ll Get with Your 10×20 Hip Roof Storage Shed Plan!
19 step-by-step sections that guide you through the whole process.
Designed for beginners as well as for the professionals.
Explanatory 3D images so you can see exactly what to do next.
Comprehensive materials list that gives you exactly what you need.
Your plan will look great on any mobile device.
PRO-TIPS throughout the build.
High quality PDF plan with everything you need emailed to you instantly.
How to Build a 10×20 Hip Roof Shed: The Steps at a Glance
This is a short overview of how the 10×20 hip roof shed goes together. The full plan PDF has 19 build steps on 73 pages, with the cut length and count of every part, a shopping list with quantities and drawings for the steps.
Step # 1: Check the Rules Where You Live
Rules for sheds, such as size limits, setbacks and permits, vary by town and HOA. Check your local permit office before you build.
Step # 2: Know the Size of Your 10×20 Shed
The shed is 20 ft wide and 10 ft deep (200 sq ft of floor). The walls are 94 1/2″ tall including the plates, with a 6/12 roof. The roof peaks about 11′ 5 5/16″ above the ground. It has a double door in the front wall and 2 windows (36″ by 36″ rough openings). The plan estimates about 80 hours of work for two people.
Step # 3: Get the Tools and Materials
You need basic carpentry tools: a circular saw, a speed square, a drill/driver, a framing hammer or nailer, a 4 ft level and a tape measure. The main materials are pressure-treated 4×4 skids and 2×6 floor joists, 3/4 in tongue and groove plywood, 2×4 studs, 5/8 in T1-11 siding, 2×4 rafters, 7/16 in OSB, roofing felt, drip edge and asphalt shingles. The plan’s shopping list gives the quantity of each.
Step # 4: Build the Foundation and Floor
Lay a compacted gravel pad and set the pressure-treated 4×4 skids level in both directions. Build the floor frame from pressure-treated 2×6 joists 16 in on center, square it by measuring the diagonals, fix it to the skids, then glue and screw the 3/4 in tongue and groove plywood on top.
Important Tips:
- Build the foundation where the shed will stand. Moving a finished shed is hard work.
- Clear plants and loose soil so the pad sits on flat, firm ground.
- Crown every skid up. The floor weight will flatten it.
Step # 5: Frame and Raise the Walls
- Frame each wall flat on the floor with 2×4 studs 16 in on center, with headers over the door and window openings.
- The door rough opening is 6′ 0″ wide by 6′ 4 1/2″ tall.
- Raise each wall with helpers (the plan says how many for each wall), check it plumb with a level, brace it and nail the corners together.
- Cover the walls with 5/8 in T1-11 siding. The plan gives the size of every sheet.
Step # 6: Frame the Roof
- Set the 2×6 ridge and the common rafters that hold it.
- Add the four hip rafters from the wall corners to the ridge.
- Fill in the jack rafters between the hips and the walls, in matching pairs.
- The eaves overhang 12″ on all four sides.
Step # 7: Sheathe and Shingle the Roof
- Nail 7/16 in OSB over the rafters.
- Add roofing felt and drip edge, then the asphalt shingles. Follow the shingle maker’s instructions.
Step # 8: Door, Window and Trim
- Build the door from the plan and hang it.
- Set the windows in their framed openings by the maker’s instructions.
- Add the fascia, soffit and corner trim.
Step # 9: Finishing Touches
- Paint or stain all exposed wood to protect it from the weather.
- Add shelves and hooks to suit what you store.
Want every measurement? The full 10×20 Hip Roof Storage Shed Plan PDF has the shopping list, the cut list and 19 build steps with drawings.
Ready to build the 10×20 hip roof shed?
$19.99 for the full PDF: every step, cut and board. 30-day money-back guarantee.
Similar hip roof plans
All hip roof plans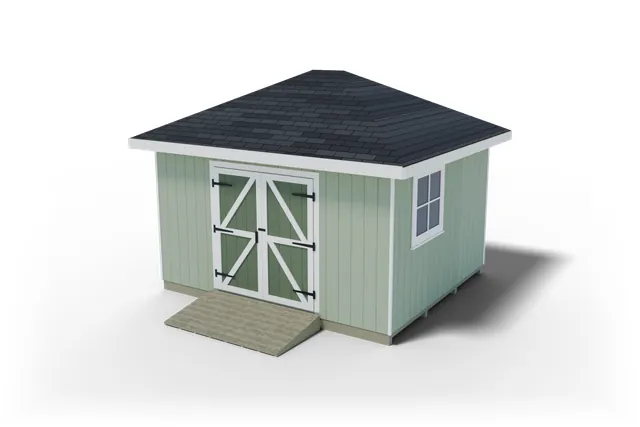
Hip roof · 168 sq ft
12×14 Hip Roof shed plan
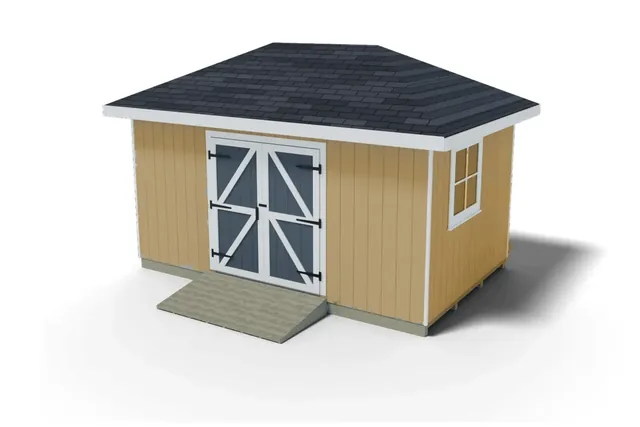
Hip roof · 160 sq ft
10×16 Hip Roof shed plan
Hip roof · 240 sq ft