
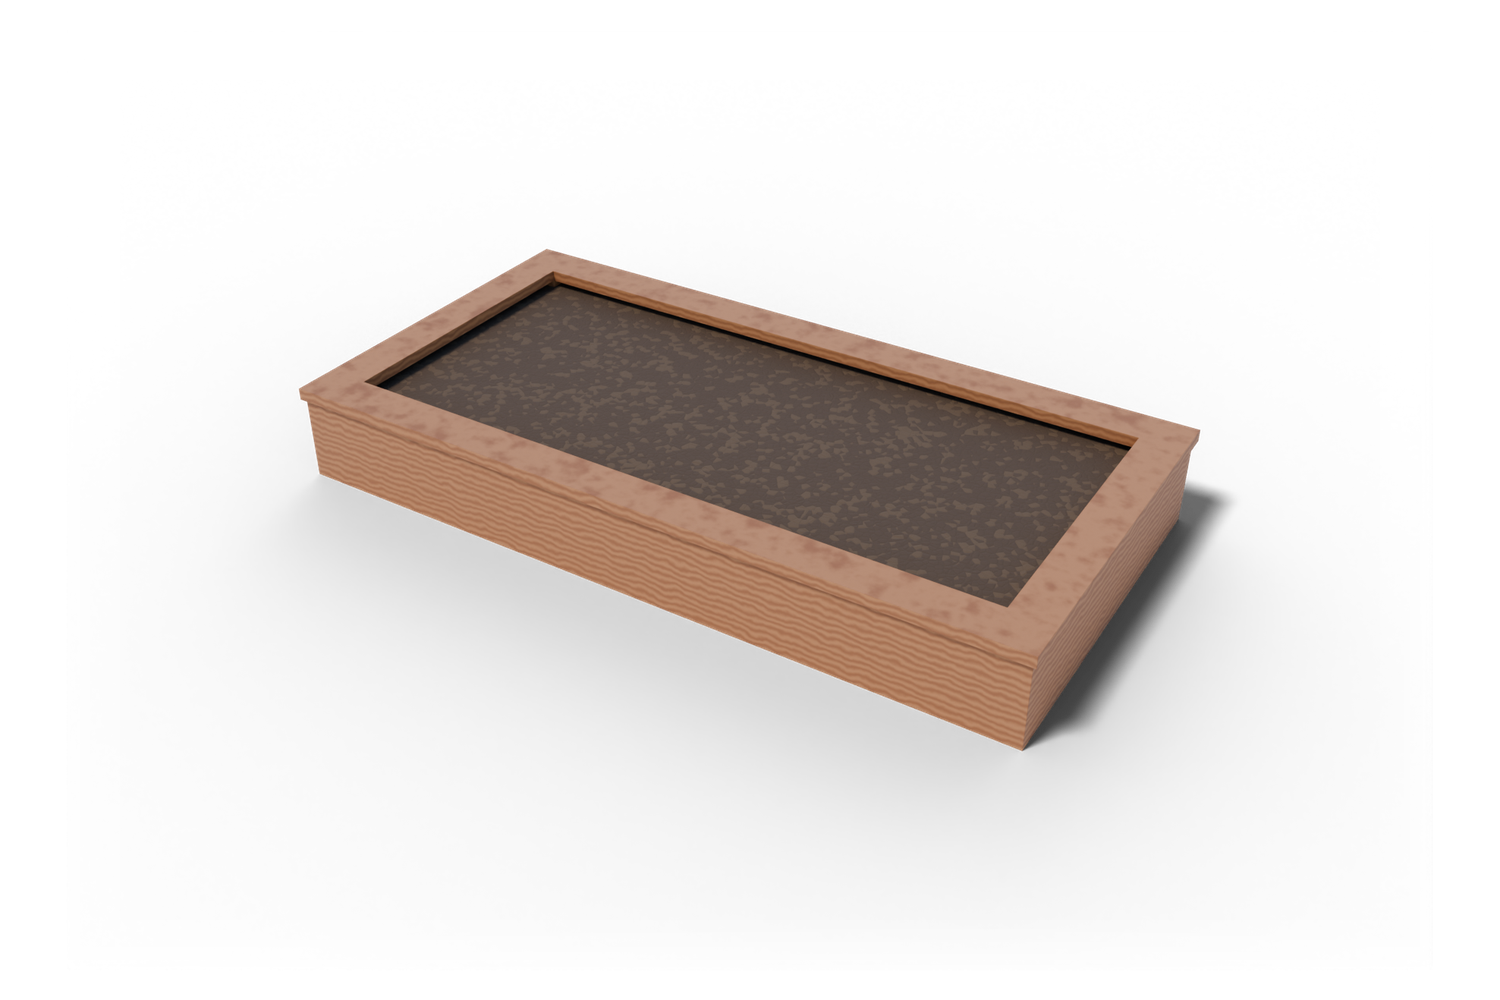
Raised garden bed · 32 sq ft
4x8 Raised Garden Bed Plan
Build this 4x8 raised garden bed yourself. Every board, cut and step, drawn in 3D across 11 pages.
- 30-day money-back guarantee
- PDF by email right after checkout
- Visa, Mastercard, Amex, PayPal
- Full material and shopping list
- Cut list with every length
- Step-by-step 3D views, 11 pages
- Phone, tablet, PC and Mac

The 3DSHEDPLANS™ 4x8 raised garden bed plan is an 11-page PDF for a cedar bed 4 by 8 ft outside and 11 in deep, open at the bottom. It holds about 24.2 cu ft of soil, and the plan tells you to order about 1.08 cu yd. You get a shopping list, a cut list, every measurement and 9 step-by-step sections, about 9 hours of work for one person.
Get the full plan PDF for $9.99 or download the free preview
What builders say
We aren't DIY-savvy and needed something simple. The plan was extremely well laid out and easy to follow.
A year ago I had only built flat-pack furniture. The plans are simple to follow, and you don't need years of experience.
The illustrations are fantastic, and the shopping list helped me buy the right materials. It took me five days to build my shed.
4×8 raised garden bed plans: what you get
These 4×8 raised garden bed plans are for a cedar bed 4 by 8 ft outside, built from 2 courses of 2×6 boards on 4×4 posts at the inside corners. It stands 11″ tall, it is open at the bottom so roots reach the soil below and water drains away, and a mitered cap on top gives you a ledge to sit on while you weed. The planting space inside the boards is 3′ 9″ by 7′ 9″, about 29.1 sq ft.
The PDF has 11 pages: the overview with every overall size, a specs table, a sizes table for 1, 2 and 3 course beds, a shopping list, a cut list with a cutting plan, tools and a fastener schedule, and 9 step-by-step sections with measured drawings and 3D views, from marking the corners on the lawn to the first planting.
It is a beginner build. One person can do it in about 9 hours with a saw, a drill and a level: an easy weekend. The plan was checked before it went on sale, 16 checks in all: the board lengths add up to the outside and inside sizes, the posts match the depth, the corner screws clear each other and the boards you buy hold every cut. The 4×8 raised garden bed plan sells for $9.99 as an instant PDF download that works on a phone, a tablet or a printed copy.
4×8 raised garden bed specs
Every number below comes from the plan’s own overview and specs pages. Lumber sizes are nominal: a 2×6 board is really 1 1/2 in by 5 1/2 in, and a 4×4 post is 3 1/2 in square.
| Spec | Value |
|---|---|
| Outside size | 4′ 0″ by 8′ 0″ (4 by 8 ft) |
| Inside (planting space) | 3′ 9″ by 7′ 9″ (29.1 sq ft) |
| Depth | 2 courses of 2×6 boards: 11″ |
| Corners | 4 cedar 4×4 posts inside the corners, 11″ long, flush with the top; 2 screws per board end |
| Long sides | 2 pointed 2×4 stakes, 1′ 11″ long, driven 1′ 0″ into the ground (1 per long side) |
| Bottom | open; cardboard or landscape fabric under it smothers the grass; 1/2 in hardware cloth against gophers is optional |
| Cap | mitered 2×6 ledge, 1/2″ past the boards outside (optional) |
| Soil | the box holds 24.2 cu ft filled to 1 in under the top; order about 1.08 cu yd (29.1 cu ft) |
| Screws | 32 exterior screws 3 in and 34 exterior screws 2 1/2 in, 304 stainless or coated |
| Weight of the frame | about 72 lb without the cap, a two-person carry |
| Build time | about 9 hours for one person |
| The PDF | 11 pages, 9 step-by-step sections |
How deep is the bed, and how much soil does it take?
The plan builds the 2 course bed, 11″ deep. Filled to 1 in under the top, the box holds about 24.2 cu ft of soil. New mix settles in the first weeks, so the plan tells you to order 20% more: about 1.08 cu yd, which is 29.1 cu ft or 15 bags of 2 cu ft.
The same steps build all three depths, and the PDF has a table with the parts, screws and soil for each. One course suits lettuce and herbs over good ground, two courses suit most vegetables, and three courses suit root crops, poor soil below or a gardener who wants less bending. This is how the soil changes with the depth for this footprint:
| Depth | Height | Box holds | Order | Bags of 2 cu ft |
|---|---|---|---|---|
| 1 course | 5 1/2″ | 10.9 cu ft | 0.48 cu yd | 7 |
| 2 courses (this plan) | 11″ | 24.2 cu ft | 1.08 cu yd | 15 |
| 3 courses | 1′ 4 1/2″ | 37.5 cu ft | 1.67 cu yd | 23 |
Bagged mix is easy for a small bed. For a bigger order, a garden center or a landscape yard can deliver bulk mix by the cubic yard, which often costs less per cubic foot. Ask what is in it before you buy.
The board stack and the corner posts
The bed is a stack of 2 courses of 2×6 boards. The 4 long side boards run the full length, 8′ 0″, and the 4 end boards, 3′ 9″ each, fit between them. That keeps the outside size the size you mark on the ground, and it means the long boards keep their factory ends, so there are fewer cuts to make.
Each corner has a cedar 4×4 post inside the boards, cut to 11″, the depth of the bed, so it ends flush with the top. Every board end gets two 3 in exterior screws into its post, pre-drilled. The two screw patterns are drawn on the plan: the long boards take theirs 3 1/4″ from the board end (the middle of the post) and 1 1/4″ from each edge, and the end boards take theirs 1″ from the end and 2″ from each edge. The two lines of screws pass 3/4″ apart in height inside the post, so they never meet. That is 32 corner screws in all.
You build the two end panels flat first, on a driveway or a sheet of plywood on sawhorses, then stand them up and screw the long boards across them. Before the last screws you square the bed by its diagonals: both must be 8′ 11 5/16″. The plan uses screws, not nails, because the soil pushes the boards outward all season.
Mid stakes and the cross tie: holding the long sides
Wet soil pushes hard on a long side, and a long board with nothing behind it bows outward over the years. The plan adds a mid stake to every long side over 6 ft. A pointed 2×4 stake inside each long side, at mid length (4′ 0″ from either outside end), is driven 1′ 0″ into the ground and screwed to every course.
Each stake is a 2×4 cut to 1′ 11″: the bed’s depth plus the 1′ 0″ that go into the ground. You point one end with two 45 degree cuts, 1 3/4″ back on each edge, set the bed in place and square it, then drive the stake with a hand sledge on a scrap block until its top is flush with the boards. No hole is dug: a stake in undisturbed soil holds far better than a post in loose fill. If a rock stops it, move it up to 6 in either way. Two 2 1/2 in screws from the inside fix it to each course. Both stakes come out of one 8 ft 2×4.
The plan is clear about what a stake does. It ties the courses together and holds the side between the corners. Cedar still moves: a bow of up to about 1/2 in over the years is normal and does no harm. If you want a dead straight side, add the cross tie: a 2×4 cut to 3′ 6″, set on edge between the two stakes with its top 1 in under the top of the boards, and fixed from outside with two 5 in structural screws through the board and the stake into each end. A 3 course bed gets the tie as standard, and the plan shows it step by step. Use the structural screws it lists, not deck screws.
The optional mitered cap
The cap is a frame of 2×6 boards laid flat on the top course. It covers the board tops and the post ends, sheds rain off the end grain and gives you a ledge to sit on or set a tray on while you weed and harvest. It overhangs the boards 1/2″ on the outside.
You cut two long caps at 8′ 1″ and two end caps at 4′ 1″, long point to long point, with 45 degree miters at both ends. Dry-fit all four first and trim a miter a hair if a joint opens. Each corner gets two 2 1/2 in screws down into the corner post and one across the miter from the side to pull it tight. Between the corners, 5 screws go along each long cap and 2 along each end cap, about every 16 in, into the top course: 26 cap screws in all.
The cap is optional. The bed works the same without it, and you can add it later. The shopping list keeps the cap boards on their own lines, so you can leave them off the order if you want to save the wood.
Cedar, treated lumber and a liner
The plan is drawn in cedar: Western red cedar or another rot-resistant wood. Cedar is light, easy to cut and screw, and holds up in soil without any finish. The plan says cedar in soil contact often lasts 10 to 15 years. Keep mulch and soil off the outside faces, and it lasts longer.
Cedar comes rough-sawn or smooth. Pick one kind for the whole bed so the boards match. Rough-sawn boards can be thicker, about 1 3/4 in by 5 3/4 in, and the plan explains what to change if yours are: cut the posts to the real depth of your courses and the stakes the same amount longer, keep the end boards as listed, and make both diagonals equal.
Never paint or stain the inside faces the soil touches. Seal the end grain of each cut with a plant-safe oil, or leave the cedar bare. Cedar’s oils stain and corrode plain steel, so the plan calls for 304 stainless screws or screws coated for cedar or treated lumber.
If you build in pressure-treated lumber instead, the plan asks you to talk to your local extension office about using it for food plants. Many say modern treated wood is fine; some suggest a plastic liner on the inside of the walls only, never on the bottom, so water still drains. The cut list and the steps are the same in either wood.
Materials list for the 4×8 raised garden bed
The plan’s shopping list has 9 lines. The boards are listed in the stock lengths that waste the least, and the cutting plan shows which board each part comes from. In short, this is what you buy:
- Cedar 2×4 x 8 ft: 1 for the mid stakes
- Cedar 2×6 x 8 ft: 6 for the long side boards and end boards
- Cedar 2×6 x 10 ft: 3 for the long caps and end caps
- Cedar 4×4 x 8 ft: 1 for the corner posts
- Screws: 32 exterior screws 3 in and 34 exterior screws 2 1/2 in, 304 stainless or coated for cedar
- Soil: about 1.08 cu yd of garden soil mix
- Optional: 40 sq ft of landscape fabric or plain cardboard for the bottom, and 8 ft of 48 in wide hardware cloth with staples against gophers and voles
The full list, with the cut list and the cutting plan, is in the plan PDF.
Buy straight boards with few knots: sight down each one at the store. The plan does not list prices because lumber costs change every week, and cedar is the main cost. Take the list to your lumber yard or home center for a quote.
Tools you need
Nothing on this list is a specialty tool, and most of it is in a basic home tool kit. The plan has the same list with what each tool is for, and a fastener schedule for every joint.
- Circular saw or miter saw and a speed square, for the square cuts, the stake points and the cap miters
- Drill/driver with a 1/8 in bit and driver bits for your screws
- Tape measure, pencil, 4 ft level and a string line
- Flat spade and a rake, to level the ground and spread the soil
- Hand sledge (2 to 3 lb) and a scrap block, to drive the mid stakes
- Two clamps, to hold the boards to the posts while you screw
- Staple gun, if you line the bottom with hardware cloth
- Safety glasses, gloves and hearing protection
Pre-drill every board end. Cedar splits easily near the end, and a pilot hole lets the screw pull the board tight to the post.
How to build the 4×8 raised garden bed, step by step
The PDF splits the build into 9 step-by-step sections, each with numbered steps, measured drawings and a 3D view with the new parts in orange. This is the order the plan follows:
Step 1: Choose and prepare the site
Mark the outside corners 4′ 0″ by 8′ 0″ with stakes and string, square them so both diagonals are 8′ 11 5/16″, rake the footprint level and lay cardboard or landscape fabric over the grass with 6 in overlaps.
Step 2: Cut the parts
Cut the 4 end boards at 3′ 9″, check the 4 long boards are a full 8′ 0″, and cut the 4 corner posts at 11″. Cut and point the 2 mid stakes at 1′ 11″.
Step 3: Build the two end panels
Lay two posts flat, screw the end boards across them flush with the post tops, and check each panel for square.
Step 4: Join the long sides
Stand the end panels up, screw the long boards to the posts course by course, and square the bed by its diagonals before the last screws.
Step 5: Set it in place and drive the mid stakes
Set the bed on its marks and level it both ways, then drive the stakes inside the long sides and screw each course to them. Line the bottom with hardware cloth now if gophers or voles are a problem.
Step 6: Optional cap
Cut the mitered cap pieces, dry-fit them and screw them down: 26 screws in all.
Step 7: Fill and plant
Fill in layers with about 1.08 cu yd of raised bed mix, water each layer, rake it level, then plant and mulch.
Step 8: Care and seasons
Top up with compost each spring, check the screws, and keep soil and mulch off the outside faces.
Typical time for one person, from the plan: site, level and smother the grass 2 h; cut the parts 1 h; end panels, long sides, square 2 h; set in place, stakes, cap 2 h; fill with soil 2 h. About 9 hours in all. One person can build the bed; a helper makes carrying and squaring it easier.
Where to put a raised bed
- Sun. Most vegetables want 6 to 8 hours of sun a day. Watch the spot for a day before you build, because a fence or a tree can shade more than you think.
- Water. Put the bed near a hose. A bed you can water in two minutes gets watered.
- Roots. Keep away from trees and big shrubs. Their roots find the loose, rich soil and take the water.
- Level ground. The bottom course should sit level and touch the ground all round. On a slope, dig the uphill side in rather than packing up the low side; with more than about 4 in of fall along the bed, add a course on the low side or pick a flatter spot.
- Drainage. The open bottom drains into the ground below. Avoid a low spot where water stands after rain.
- Room around it. Leave a path of 24 to 36 in on every side. A bed 4 ft wide lets you reach the middle from both sides, and a wheelbarrow needs the path.
- Utilities. Call 811 before you dig or drive the stakes, so buried lines are marked first.
Filling and planting basics
Leave the soil under the bed where it is. Cut the grass short, lay plain cardboard with the tape and labels off, or landscape fabric, and fill on top. The cardboard smothers the grass and weeds and rots away by next season, and the roots go on down into the ground below.
Fill the box in layers, watering each one, and rake it level. A common home mix is about 60% topsoil, 30% compost and 10% something light such as perlite or fine bark; bagged raised bed mix works too. The plan’s 1.08 cu yd already counts the settling, and you top up after the first rains as it sinks.
Plant, mulch and water. Each spring, add 1 to 2 in of compost on top before you plant. What grows best depends on your climate and your season, so ask a local garden center or your extension office what to plant and when. If you have questions about your soil, the extension office can test it.
What is in the free 4×8 raised garden bed plan preview?
Download the free 4×8 raised garden bed plan preview before you buy. It walks through the five stages of the build with views from the full plan, from the end panels to the filled bed, so you can see how the drawings look and whether the size fits your yard.
| Item | Free preview | Full plan |
|---|---|---|
| 3D views and step overview | Yes | Yes |
| Shopping list with quantities | No | Yes |
| Cut list and cutting plan | No | Yes |
| Measurements in every step and drawing | No | Yes |
| Soil to order | No | Yes |
| 1, 2 and 3 course versions | No | Yes |
| Price | Free | $9.99 |
Not right for you? Email [email protected] within 30 days of your purchase for a full refund.
Before you build
A raised bed is a small project, but rules for garden structures, fences and setbacks vary by town and HOA. If you are unsure, check your local permit office and your HOA before you build. Call 811 before you dig.
This plan shows one way to build a raised garden bed using common woodworking practice. Read the whole plan once before you buy anything, then check the shopping list against the steps. Measure twice, mark with a square and cut on the waste side of the line.
Every spring, check the screws and drive a loose one in a new pilot hole beside the old, look along the long sides for any bow, and add a fresh layer of compost.
Frequently asked questions
How much soil does a 4×8 raised garden bed need?
The bed holds about 24.2 cu ft filled to 1 in under the top. Order about 1.08 cu yd (29.1 cu ft, or 15 bags of 2 cu ft), because new mix settles.
How deep is the bed, and can I build it deeper?
The plan builds 2 courses of 2×6 boards, 11" deep. The PDF also lists the parts and soil for 1 and 3 courses; a 3 course bed is 1' 4 1/2" deep and holds 37.5 cu ft.
Do the long sides need support?
Each long side has 1 pointed 2×4 stake driven 1' 0" into the ground and screwed to every course. A bow of up to about 1/2 in over the years is normal; add the cross tie for a dead straight side.
Should I use cedar or pressure-treated lumber?
The plan is drawn in cedar, which lasts about 10 to 15 years in soil contact. For treated lumber, ask your local extension office about food plants; some suggest a liner on the inside walls only.
Do I need a permit for a raised garden bed?
Raised beds rarely need one, but rules for garden structures vary by town and HOA. If you are unsure, check your local permit office.
More about the 4×8 raised garden bed plan
Inside the 4×8 raised garden bed plan PDF
The 11-page PDF follows the build from start to finish, with 9 step-by-step sections. These are its parts in print order:
- Disclaimer and copyright: what the plan is, safety, and where to ask about local rules, soil and treated lumber.
- Contents: every section with its page.
- Overview and dimensions: the bed described in one paragraph, a long side from outside and the bed seen from above.
- How to use this plan: nominal and actual lumber sizes, rough-sawn cedar, outside and inside sizes and the typical time.
- Specs: outside and inside size, depth, corners, long sides, bottom, cap, soil, lumber and screws.
- Sizes: 1, 2 or 3 courses: the parts, boards, screws and soil for each depth.
- Shopping list: the cedar boards by stock length, then the hardware and supplies.
- Cut list and cutting plan: every part with its length and which board each part comes from.
- Tools and fasteners: the tool list and a fastener schedule for every joint.
- Choose and prepare the site: sun, water, layout, squaring by the diagonals, leveling and smothering the grass.
- Cut the parts: the end boards, posts and the pointed stakes, and sealing the end grain.
- Build the two end panels: posts and end boards screwed flat, with the corner screw pattern.
- Join the long sides: the long boards on the posts, course by course, and the square check.
- Set it in place and drive the mid stakes: leveling, driving the stakes, the cross tie and the optional hardware cloth.
- Optional cap: the mitered cap cut, dry-fit and screwed down.
- Fill and plant: the soil to order, a common mix and filling in layers.
- Care and seasons: the yearly check, the cross tie if a side bows, and treated lumber.
Ready to build the 4×8 raised garden bed?
$9.99 for the full PDF: every step, cut and board. 30-day money-back guarantee.