
Build Your Own 8X16 Hip Roof Storage Shed With Ease!
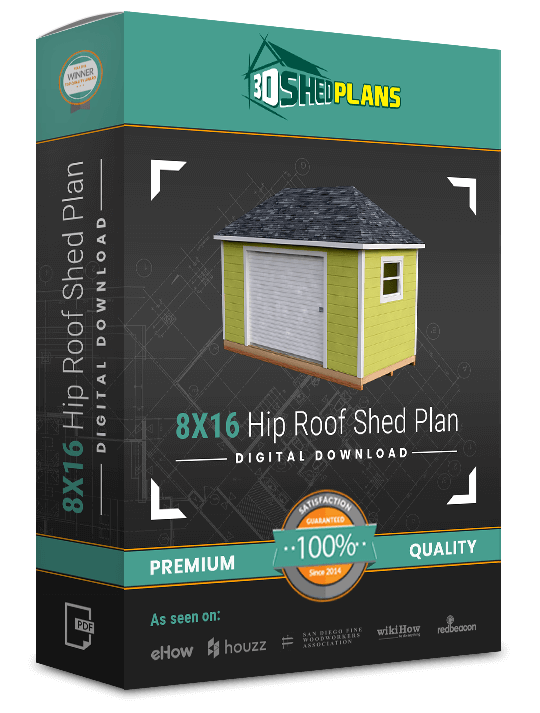
Wondering how to make your garden more functional? Maybe you want to appreciate the value of your house? In either case, this 8X16 Hip Roof Storage Shed is your way to go! This shed offers ample space for you to keep your equipment and supplies while at the same time maintains its structural integrity for years. It is an easy to build yet highly functional structure that will not only add elegance to your garden but will also add functionality. So wait no more - order now and start building today...
Shed Plan Includes:
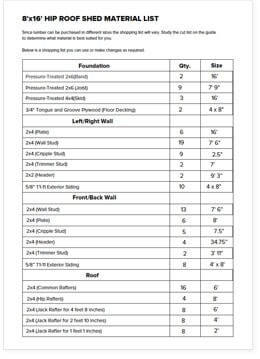
A Full-Fledge Material List with Required Quantity
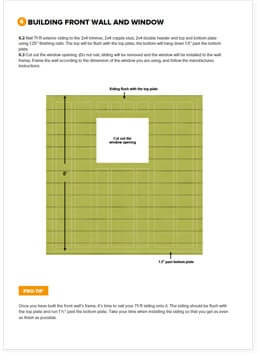
The materials you use to build a shed are the secrets to your success. Unfortunately, most plans out there won’t precisely tell you what to buy and in what quantity. In fact, they would lure you to buy products from the plan-sellers. Luckily, we have a completely different motto. We want you to succeed in building your dream shed. And for that, we understand how important it is to get the right materials.
Our 8X16 Hip Roof Storage Shed Plan comes with an all-inclusive list of materials, hardware and tools that you would need to build the shed. Nothing more, nothing less! No click baits! You get a printable list of materials that you can take to the hardware store. Did we forget to mention we have carefully only included materials that are light on your pocket and good in performance?
Shed Plan Includes:
Simple, Easy to Understand Step by Step Instructions
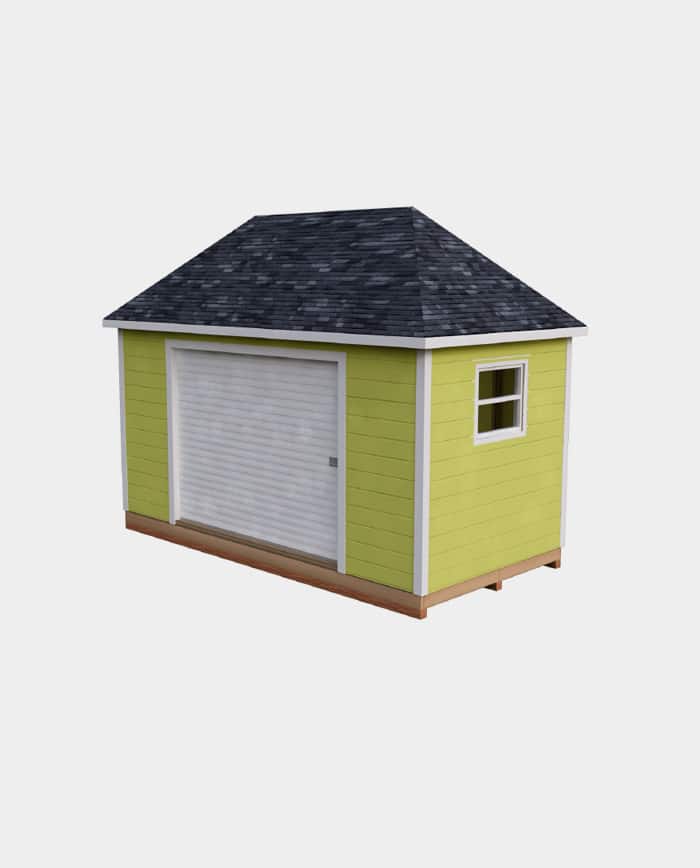
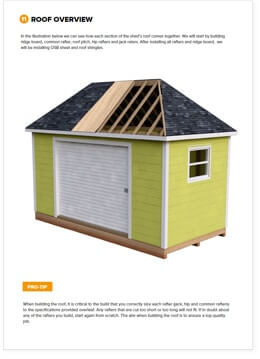
2D images are a thing of the past! Our 8X16 Hip Roof Storage Shed Plan comes with 3D rendered images, which means you get to see every corner, every angle and every inch clearly as if it is being right in front of you by a professional. You won’t have to scratch your head thinking how the shed should from the front, back or the sides. Even the rooftops are visualized in 3D for better understanding.
Shed Plan Includes:
3D Rendered Images for Reality Check
2D illustration don’t help you understand the dimensions. This is why we bring in 3D rendered images that look like as if they are right in front of you. You get to see every angle, every corner and every inch of the shed to get a feel of how the shed should look like.
Building Your Own Shed vs. Getting Professional Help
1st Reason
You Get to Save $1500 and Upwards
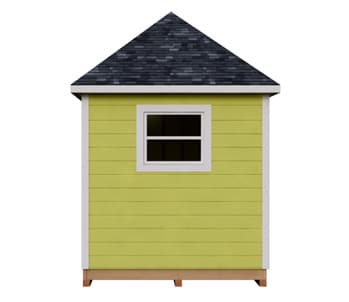
Probably the most important reason for building your own shed is that you get to save a fortune! Professionals would charge you thousands of dollars for doing something that even you can. With our 8X16 Hip Roof Storage Shed Plan, you get clear instructions, material lists and diagrams to go through the process easily. What’s the need of spending thousands when you can do it yourself easily?

2nd Reason
Choose Your Own Design and Make Your Dream Come True
Don’t fall for the marketing gimmicks of most professionals out there. When you start building your own shed, the world is out there for you to explore. With our material list and instructions, you will realize that you can build your dream shed without any design restrictions. The plan is simple yet it gives you the liberty to add in your own flavor!
3rd Reason
You Will Reclaim Your House Again
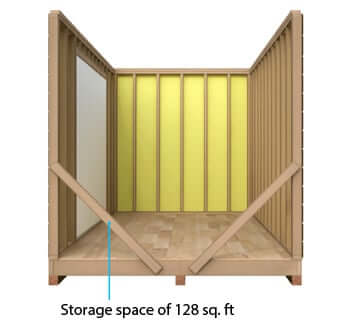
This 8X16 Hip Roof Storage Shed is spacious enough to fulfil your storage requirements. Whether you are a gardeners or an athlete, you can use the shed to keep all sorts of your equipment and tools. Besides, the shed will add an exquisiteness to your garden while fulfilling its purpose.

All the Other Reasons
This Is Exactly What You'll Get with Your 8X16 Hip Roof Storage Shed Plan!
40+ steps that expertly guide you through the whole process.
Designed for beginners as well as for the professionals.
Explanatory 3D images so you can see exactly what to do next.
Comprehensive materials list that gives you exactly what you need.
Your plan will look great on any mobile device.
Free PRO-TIP for every section.
High quality PDF plan with everything you need emailed to you instantly.
Shed Type:
Storage
Number of Doors:
1
Roof Shape:
Hip Roof
Door Type:
Double
Depth (ft.):
8′
Door Opening Height (in.):
72"
Width (ft.):
16′
Door Opening Width (in.):
60″
Depth (in.):
96″
Door Opening Height (ft.):
6″
Height (in.):
112″
Floor Options:
0.75" Tongue and Groove Plywood
Width (in.):
192″
Number of Windows:
0
Exact Width x Depth:
8' 1" x 16' 1"
Recommend Roofing Material:
7/16 OSB Sheet Board
Sidewall Height (in.):
91 1/2"
How to Build an 8×16 Hip-Roof Shed in a Week or Less?
Are you looking for a shed that stands out on your property? Do you want a big garage for your favorite wheels? A hip-roof shed is definitely for you. Available in medium and large sizes, a hip-roof shed has soffits and eave hanging from the four sides of the roof. Worried about spending thousands of dollars on just a shed in your yard? That is no longer a problem.
Welcome to 3DSHEDPLANS. We make building a shed in your yard quite easy. Our simple 10-step guide to shed building carved down by professional workers give you all the instructions you would need to make a beautiful shed in your outer space. If you are thinking that you have never even replaced your own flooring, it is not an issue either. Our FREE AND PREMIUM shed plans are specially designed for amateurs and people who don’t know anything about wood working.
Follow our step by step guide to make a shed in your yard.
Step # 1: Legal Permits on House Extension
It is very important to know the law of your state in details. A lot of states require you to acquire a permit before you go about making an extension to your property. Consult the district attorney to get all the necessary details about the permit and acquire it before going any further with your shed building plan.
Step # 2: The Type & Size
Depending on what you need a shed for, decide the type and size of the shed. Smaller sheds are best suited for storage purposes only however, sheds ranging from medium large to large in size can serve a variety of purposes. They can be converted into a garage or a pool house or a gymnasium or a lot more. Sheds come in 3 basic types differing according to their roof structures.
-
Lean-to Sheds: As the name says, this shed leans against a pre-constructed wall. It could be your garden’s wall or your back yard’s, the lean to shed is best suited for storage purposes and is usually constructed in smaller sizes.
-
Gable Sheds: Gable sheds are a mini cabin. They can vary from small to medium large sizes and are suited for both storage and other purposes. A Gable shed roof is simple with an ideal pitch of 1/4 or 1/3.
-
Hip Roof Sheds: A little more complicated and sophisticated, the hip-roof sheds are designed for regions with extreme weather. Their multifaceted tilted roof makes them sturdy and gives them quite an exquisite look.
Step # 3: Supplies & Tools Required:
Once you know the type and size of shed you want, it is now time to go shopping and get yourself all the supplies and tools needed. A hip-roof shed is a little complicated and you may need a few more tools in addition to the basic construction tools. Collect pressure treated timber, tongue and groove plywood, asphalt or cedar shingles, trusses and rafters, L-joints, floor joints, and roof sheathing etc. you will require hammer, saw, galvanized nails and joints for construction. For a complete shopping list with the quantities listed down for you, you may want to order our PREMIUM SHED PLAN which comes with a lot more additional details and precise measurements and quantity of supplies.
Step # 4: Dimensions of 8×16 Hip-roof shed
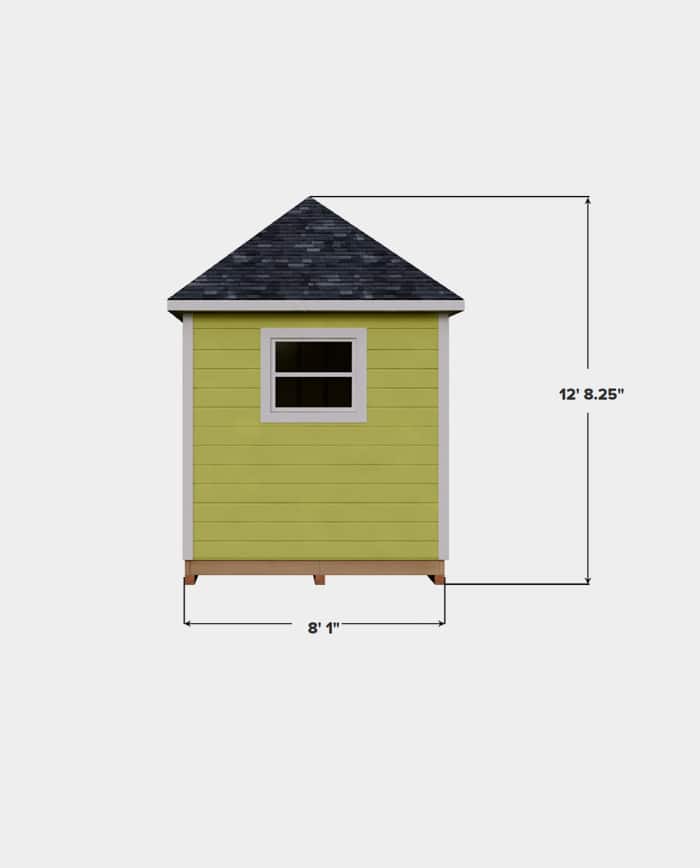
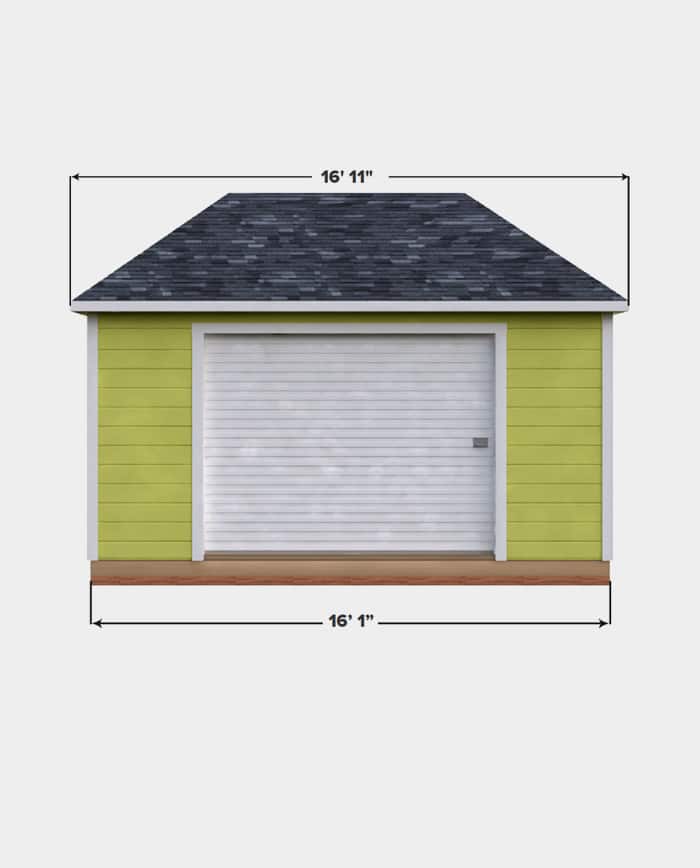
With shopping done, it is now time for some final paper work. Don’t get me wrong, you don’t need more legal paper work but you need to now jot down all the dimensions of your shed. The maximum height of the shed is 12 feet and 8 ¼ inches while the width is 16 feet and 1 inch. The frontal width measures 8 feet and 1 inch. You will also be required to install a door and window in your shed but these you will have to buy separately and install according to the manufacturer’s manual.
Step # 5: Foundation & Flooring
A skid foundation is the easiest framework for the base of your shed. For a 8×16 shed, you can make the foundation framework using pressure treated timber according to your shed’s front and sided width dimensions. Place 3 pressure treated timber skids each measuring 16 feet in length. Place 8 floor joists across them measuring 8 feet in length. Nail the rim joists and floor joists together making a sturdy foundation. Once the skid foundation is done, layer it with a ¾ inch thick, tongue and groove plywood. You may use L-Joints and galvanized nails to fix the foundation and flooring together.
Dos & Don’ts:
Do’s:
-
Make the shed foundation where you plan to build the entire shed otherwise moving the heavy foundation might cause damage to the structure.
-
Nail the rim and floor joists very sturdily for a stable foundation or your entire shed structure will be in jeopardy.
Don’ts:
-
Don’t make the shed over loose sand or vegetation as it impacts the stability and also causes damage due to over exposure to moisture.
Step # 6: Wall Structure & Affixing the Walls
Make the wall structure independently according to the dimensions of your shed. The height of your walls will be 7 feet and 6 inches.
-
Start with building the right and left walls first using the same pressure treated timber. Make the top and bottom plates first.
-
The right wall will accommodate a big garage door as well so once you are done with the frame work, make cuts for the door.
-
Make use of t1-11 sheathing and nail it using galvanized nails to the exterior of the framework. Follow the same steps for the front and back wall ensuring you cut space for the window on the front wall.
-
Erect the walls on the foundation using L-joints and cripple studs and galvanized nails and fix the walls together at the edges.
TIP:
-
You may use temporary brackets for the purpose and remove them after you have fixed the walls.
Step # 7: Roof Framework
Making a hip-shed roof can be tricky.
-
Start by making a foundation with rafters. Fix common rafters along the ridge beam according to your shed’s dimensions.
-
Line the Common rafters along the sides of the beam and fix them using galvanized nails. Make the structure sturdy using hip and jack rafters.
-
The beam and all rafters should spread at a width of 16 feet and 1 inch.
Tip: you will need additional help while fixing the rafters on the beam to help with the heavy lifting.
Step # 8: Roof Covering
Once the roof structure is done, nail ¾ plywood sheathing over it using galvanized nails. After the sheathing of plywood, you may want to add shingles to make the roof leakage proof and durable. While there are different types of shingles, asphalt shingles are most recommended.
Step # 9: Fascia & Soffit Installation
Once you are done with the roof covering, you can now install the fascia boards to give your shed a more finished and refined looks. Lastly install the soffits along the trims to prevent leakage from edges.
Step # 10: Finishing the Shed
-
Follow the manufacturer’s manual to install the door and window to your shed. Once the window and door is installed, your shed is ready.
-
You might want to coat the exterior with lacquer to prevent damage or you can bring out your creativity and paint your shed the way you like.
-
You can also insulate the shed if you plan on making use of electrical equipment inside.
Your 8×16 hip-roof shed is now ready for use. If you are looking for more detailed step by step instructions, we recommend downloading one of our PREMIUM PLANS that come with a complete list of materials and tools required, step by step instructions and even professional tips to get you going right away!
Order Now & Start Building Your Own 8X16 Shed Today!
As seen on:

30-Day No Questions, No Holds-Barred, 100% Money Back Guarantee!
Fast & secure (SSL) checkout. Instant product delivery!
$19.99

One time payment. No hidden fees.