
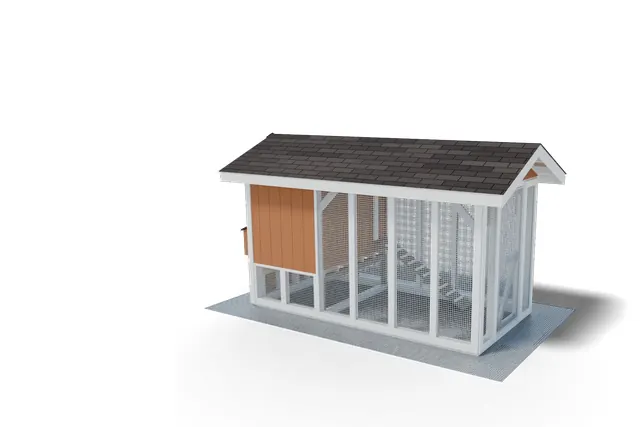
Chicken coop with run · 72 sq ft
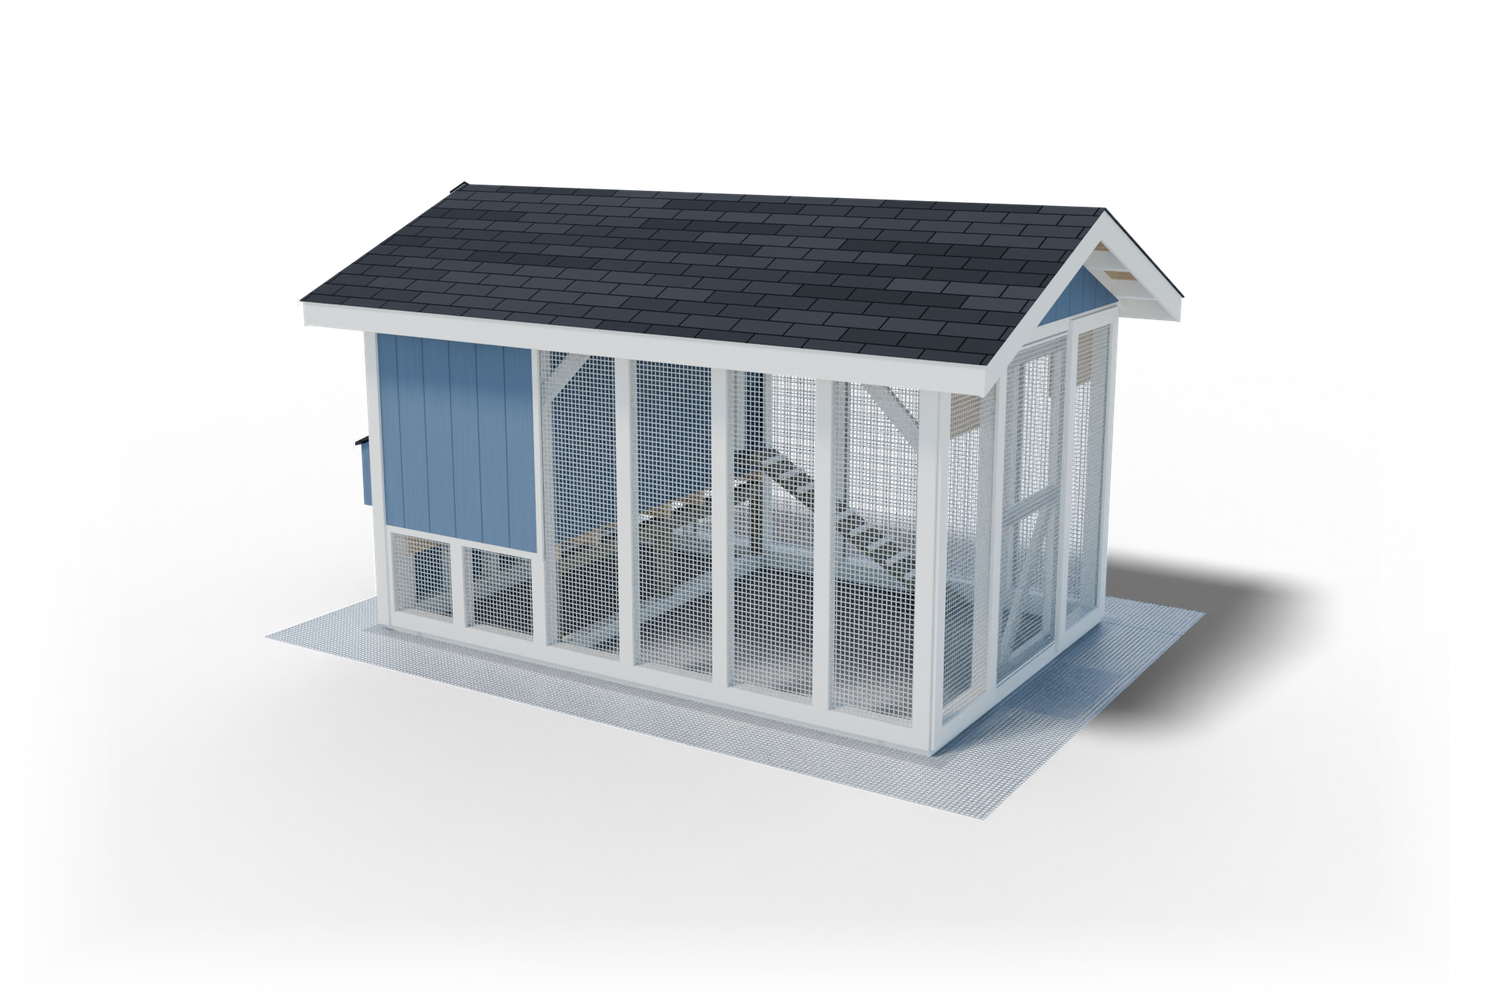
Chicken coop with run · 96 sq ft
8x12 Chicken Coop with Run Plan
Build this 8x12 chicken coop with run yourself. Every board, cut and step, drawn in 3D across 48 pages.
$19.99
$29.99−33%
- 30-day money-back guarantee
- PDF by email right after checkout
- Visa, Mastercard, Amex, PayPal
- Full material and shopping list
- Cut list with every length
- Step-by-step 3D views, 48 pages
- Phone, tablet, PC and Mac
As seen on
The 3DSHEDPLANS™ 8x12 chicken coop with run plan is a 48-page PDF for a raised hen house and a covered, walk-in run under one gable roof, 8' 0" deep and 12' 0" long, for 8 hens. It has a shopping list, a cut list and 15 step-by-step sections.
Get the full plan PDF for $19.99 or download the free preview
What builders say
Pre-built sheds were hundreds of dollars. The plan laid everything out perfectly, and I saved hundreds in the process.
I worked as a joiner's assistant for three years and was skeptical. The plan was well laid out and beautifully illustrated.
A project for me and my son. The plan arrived in my email almost instantly, and everything we needed was included.
8×12 chicken coop with run plans: what you get
These 8×12 chicken coop with run plans are for a coop and run in one building: a hen house raised 2′ 4″ off the ground at the left end, and a run you can walk into filling the rest of the 12′ 0″ length, all under one shingled gable roof. The hens get a dry, shaded run all day and a closed house for the night and for laying, and you get one building to build instead of a coop and a separate pen.
The PDF has 48 pages: a shopping list by building stage, a cut list with every length and the boards to buy, and 15 step-by-step sections with measured drawings and a picture of the coop at the end of each step, from the stone strip under the sills to the roost bars inside.
Every part in the lists is drawn on its step page, and the shopping list, the cut list and the drawings were checked against each other part for part. The 8×12 chicken coop with run plan sells for $19.99 as an instant PDF download that works on a phone, a tablet or a printed copy.
How many chickens fit in an 8×12 coop with run?
The plan is laid out for 8 standard hens. The hen house has about 26 sq ft of clear floor inside, and the run about 83 sq ft of covered ground, the space under the raised house included. There are 2 nests in the nest box and 7′ 4 3/4″ of roost bar, about 10 in for each bird.
The house is for the night and for laying; the birds spend the day in the run. Bantams need less room and large breeds more, so count your own birds against those numbers.
8×12 chicken coop with run specs
Every number below comes from the plan’s own specs page. Lumber sizes are nominal: a 2×4 is really 1 1/2 in by 3 1/2 in, and a 4×4 is 3 1/2 in square.
| Spec | Value |
|---|---|
| Footprint | 8′ 0″ x 12′ 0″, sill to sill |
| Roof | 9′ 4″ x 14′ 0″, 5 in 12 gable, 8 in eaves, 12 in rakes, shingled |
| Height | 6′ 8″ to the wall top, about 8′ 7″ to the ridge |
| Hens | 8 standard hens |
| Hen house | 4′ 0″ of the length, floor 2′ 4″ above the ground, about 26 sq ft of clear floor |
| Run | about 83 sq ft of ground, 6′ 4 1/2″ clear under the rafter ties |
| Nest boxes | 2 nests in one box on the left end, lid opens from outside |
| Roost | 7′ 4 3/4″ of 2×4 roost bar over droppings boards |
| Frame | treated 4×4 sills and posts, 2×4 studs at 24 in, double top plates, 2×4 rafters at 24 in |
| Skin | 5/8 in T1-11 siding on the house and the left end, 1/2 in hardware cloth on every open face, a 24 in cloth apron on the ground |
| Foundation | a stone strip under the sills, 4 auger ground anchors |
| The PDF | 48 pages, 15 step-by-step sections |
The base: a stone strip and treated sills
The coop needs no slab and no post holes. A shallow strip of crushed stone goes under the line of the sills, and treated 4×4 sills lie flat on it, joined at the corners with steel framing angles. The run floor is your own ground inside the sills, so the hens can scratch and dust-bathe.
4 auger ground anchors turn into the soil next to the sills and strap them down, so the coop stays put in a storm. Do not leave them out.
Walls and the raised house floor
The front and back walls are built flat on the ground and tilted up: treated 4×4 posts at the corners and at the partition, 2×4 studs at 24 in between a treated bottom plate and a double top plate. The two end walls and the partition between house and run fit between them. Raising the long walls takes two people.
The hen house floor sits 2′ 4″ above the ground on a 2×6 ledger and a treated 4×4 beam on jacks, with 2×4 joists and a 3/4 in plywood floor. Sheet vinyl on top makes cleaning out a scrape and a sweep. The hens use the shaded ground under the house too.
The roof: one gable over house and run
2×4 rafters at 24 in meet a 2×6 ridge board, with a rafter tie across every inside pair and a hurricane tie at every rafter seat (14 in all). The roof is 9′ 4″ by 14′ 0″, so the eaves and rakes keep rain off the cloth walls and the run floor stays dry.
The deck is 6 sheets of 1/2 in plywood (4 by 8 ft), with drip edge, roofing felt and 6 bundles of 3-tab shingles. The roof is shingled from ladders, and the plan shows the order: drip edge, felt, a starter row, the shingles and the ridge caps.
Nest box, cleanout hatch and pop door
The nest box with 2 nests hangs on the outside of the left end, and its lid lifts from outside, so you collect eggs without going in. Below it, a cleanout hatch opens the whole house end for raking out the bedding. Both close with a latch that needs two moves.
A sliding pop door in the partition lets the hens down a cleated ramp into the run. A cord runs to the outside so you can open and close it without stepping into the run.
Roost bars, droppings boards and fresh air
The roost is 7′ 4 3/4″ of plain 2×4 on edge, set over droppings boards you lift out and scrape. The roost bar, the inside of the nest box and the droppings boards are untreated lumber, because the hens sit on them.
The gable over the partition is open hardware cloth and the left gable has a louver vent, both above the roost, so the house airs out without a draft on the birds.
Predator-proofing: hardware cloth and an apron
Every open face is 1/2 in, 19 gauge hardware cloth, not chicken wire, and a batten covers every cloth edge so nothing pries it loose. A 24 in cloth apron, about 48 ft of it, lies flat on the ground all around the sills and is pinned down, so a digging animal meets wire when it starts at the wall.
The paint goes on before the cloth, so no part of the frame stays bare behind the mesh.
A walk-in run door
The right end has a full-height run door, wide enough for a wheelbarrow, with a diagonal brace, three T-hinges and a self-latching gate latch you can work from both sides. Inside the run you have 6′ 4 1/2″ of clear height under the rafter ties, so you can fill feeders and waterers standing up.
Crew, time and working safely
Plan on three weekends for two people. Raising the long walls and setting the ridge board take two people; everything else one person can do with a helper close by. The PDF has a time table for each stage.
Work from a stepladder on firm, level ground. Do not stand on the top plates or the roof deck. Wear a dust mask when you cut treated lumber, wash your hands after, and keep treated offcuts and sawdust out of the run.
Materials list for the 8×12 chicken coop with run
The plan’s shopping list has 63 items, grouped by building stage so you can buy in stages, plus the trim boards, hinges, latches, fasteners and paint. In short, this is what you buy:
- Treated lumber: 21 treated boards and timbers for the sills, posts, plates, floor beam, ramp and nest box arms
- Framing lumber: 79 2×4 and 2×6 boards for the studs, rafters, ridge, floor and run door
- Sheets: 13 sheets of plywood and T1-11 siding (4 by 8 ft)
- Roofing: 6 bundles of shingles, felt and 5 pieces of drip edge
- Wire and base: 3 rolls of hardware cloth, 32 bags of crushed stone and 4 ground anchors
The full list of all 63 items, with the cut list, is in the plan PDF.
The plan does not list prices because lumber costs change every week. Take the list to the pro desk of your lumber yard or home center for a quote.
Tools you need
These are common framing tools; nothing needs to be rented. The PDF lists every tool and the fastener for every joint.
- Circular saw, and a miter saw if you have one
- Drill/driver and an impact driver for the structural screws
- Framing hammer, speed square and framing square
- 4 ft level, string line, tape measure and chalk line
- Tin snips and a staple gun for the hardware cloth
- Flat shovel and a hand tamper for the stone strip
- Two stepladders, sawhorses and clamps
- Safety glasses, ear protection, gloves and a dust mask
Use galvanized connectors and screws rated for treated lumber, and wear gloves when you handle the cut edges of hardware cloth.
How to build the 8×12 chicken coop with run, step by step
The PDF splits the build into 15 step-by-step sections, each with numbered steps, measured drawings and a picture with the new parts in orange. This is the order the plan follows:
Step 1: Site and sill frame
Lay the stone strip, set the treated sills level and square, fix the corners and turn in the ground anchors.
Step 2: Front and back walls
Build each long wall flat on the ground, tilt it up onto the sills and brace it plumb.
Step 3: End walls
Fit the two end walls between the long walls, with the hatch and run door openings.
Step 4: House floor
Fix the ledger and the beam on its jacks, lay the joists, glue and screw the floor, add the vinyl.
Step 5: Partition wall
Build the wall between house and run with the pop door opening.
Step 6: Roof frame
Set the ridge on its props, then the rafters, rafter ties and hurricane ties.
Step 7: Roof deck and shingles
Nail on the plywood, then drip edge, felt and shingles.
Step 8: Siding
Hang the T1-11 siding on the house and the left end.
Step 9: Trim, nest box, hatch and pop door
Corner boards, the nest box, the cleanout hatch and the pop door.
Step 10: Paint, hardware cloth and apron
Paint the frame, then fit the cloth, the battens and the apron.
Step 11: Run door
Build and hang the run door with its brace, hinges and latch.
Step 12: Inside the hen house
Roost bars, droppings boards and the hen ramp.
The skill level is beginner to intermediate with a helper: measuring, square and angled cuts and checking level and plumb. The glossary at the back explains every carpentry word the plan uses.
Where to put a chicken coop with run
- Ground that drains. Water must not stand in the run. Pick a spot close to level that dries out after rain.
- Sun and shade. Morning sun on the run and afternoon shade on the house is the best of both.
- Working room. Leave 3 ft all around for the nest lid and the hatch at the left end, the run door at the right end, and to lay the apron.
- Weather. Turn the solid left end toward your worst weather if you can.
- Rules and buried lines. Towns set how many hens you may keep and how far a coop must stand from the lot line. Check your local permit office, and call 811 before you turn in the ground anchors.
What is in the free 8×12 chicken coop with run plan preview?
Download the free 8×12 chicken coop with run plan preview before you buy. It shows the coop from the front and the back, the build stages in order and real pages from the plan, so you can see how the drawings look and whether the size fits your yard.
| Item | Free preview | Full plan |
|---|---|---|
| Overview, views and build stages | Yes | Yes |
| Shopping list with quantities | No | Yes |
| Cut list for every part | No | Yes |
| Measurements in every step | Overall sizes | Every part |
| Step-by-step drawings | Preview pages | 48 pages, 15 sections |
| Joint close-ups and time table | No | Yes |
| Price | Free | $19.99 |
Not right for you? Email [email protected] within 30 days of your purchase for a full refund.
Before you build
Rules for backyard hens and roofed coops (how many birds, setbacks, permits) vary by town and HOA, and so do the wind and snow a roof must carry. The rafter ties, hurricane ties and ground anchors are design choices, not a certified rating. Check your local permit office before you buy lumber.
Every season, check that the anchor straps are tight, the cloth battens are fast and the latches work. More plans are on the all plans page.
Frequently asked questions
How many chickens does the 8×12 coop with run hold?
It is laid out for 8 standard hens, with about 26 sq ft of house floor and 83 sq ft of covered run.
Do I need a concrete foundation?
No. The treated sills sit on a stone strip and 4 ground anchors strap them down. Ask your local permit office whether your town wants a different base.
Can I stand up inside the run?
Yes. There is 6' 4 1/2" of clear height under the rafter ties, and a full-height run door.
How do I collect eggs and clean out?
The nest box lid lifts from outside, and a cleanout hatch opens the house end. The floor has sheet vinyl, so cleaning out is a scrape and a sweep.
Do I need a permit for an 8×12 coop with run?
Rules for hens and coops vary by town and HOA. Check your local permit office before you build, and call 811 before you turn in the ground anchors.
More about the 8×12 chicken coop with run plan
Inside the 8×12 chicken coop with run plan PDF
The 48-page PDF follows the build from start to finish, with 15 step-by-step sections. These are its parts in print order:
- How to use this plan: how to read the drawings, store and real lumber sizes, which parts are treated, a time table for two people and working safely.
- Overview and dimensions: views from the front and the back, the front and both end elevations and every part named.
- Specs: footprint, roof, heights, hens, hen house, run, nest boxes, roost, doors, frame, skin and foundation, and what the coop was laid out for.
- Permits and siting: what to ask before you start (check your local permit office), drainage, sun and shade and the working room around the coop.
- Shopping list by section: every item with its quantity and what it is used for, grouped by building stage, plus the fasteners and supplies.
- Cut list: every part with its lumber, exact length, the boards to buy and how many parts each board gives, and every plywood and siding panel.
- Tools and fasteners: the tool list and a fastener schedule for every joint.
- Key joints up close: close-up pictures of the joints, from the sill corners to the ridge.
- Site and sill frame: the stone strip, the treated 4×4 sills, the framing angles and the ground anchors.
- Front and back walls: the long walls built flat on the ground and tilted up, braced plumb.
- Left and right end walls: the end walls fitted between the long walls, with the hatch and run door openings.
- House floor: the ledger, the beam on its jacks, the joists and the plywood floor with sheet vinyl.
- Partition wall: the wall between the hen house and the run, with the sliding pop door.
- Roof frame: the ridge board on props, the rafters, the rafter ties and the hurricane ties.
- Roof deck and shingles: plywood, drip edge, felt and shingles, worked from ladders.
- Siding: T1-11 siding on the hen house and the left end.
- Trim, nest box, hatch and pop door: corner boards, the nest box you open from outside, the cleanout hatch and the pop door guides.
- Paint, hardware cloth and apron: paint first, then the hardware cloth with battens over every edge and the apron on the ground.
- Run door: the full-height run door with its brace, hinges and a two-way latch.
- Inside the hen house: roost bars, droppings boards and the hen ramp.
- Finish and care: the anchor check and what to look at every season.
Ready to build the 8×12 chicken coop with run?
$19.99 for the full PDF: every step, cut and board. 30-day money-back guarantee.
Similar chicken coop with run plans
All chicken coop with run plans
Chicken coop with run · 128 sq ft
8×16 Chicken Coop with Run plan
Chicken coop with run · 48 sq ft