
Pergola · 120 sq ft
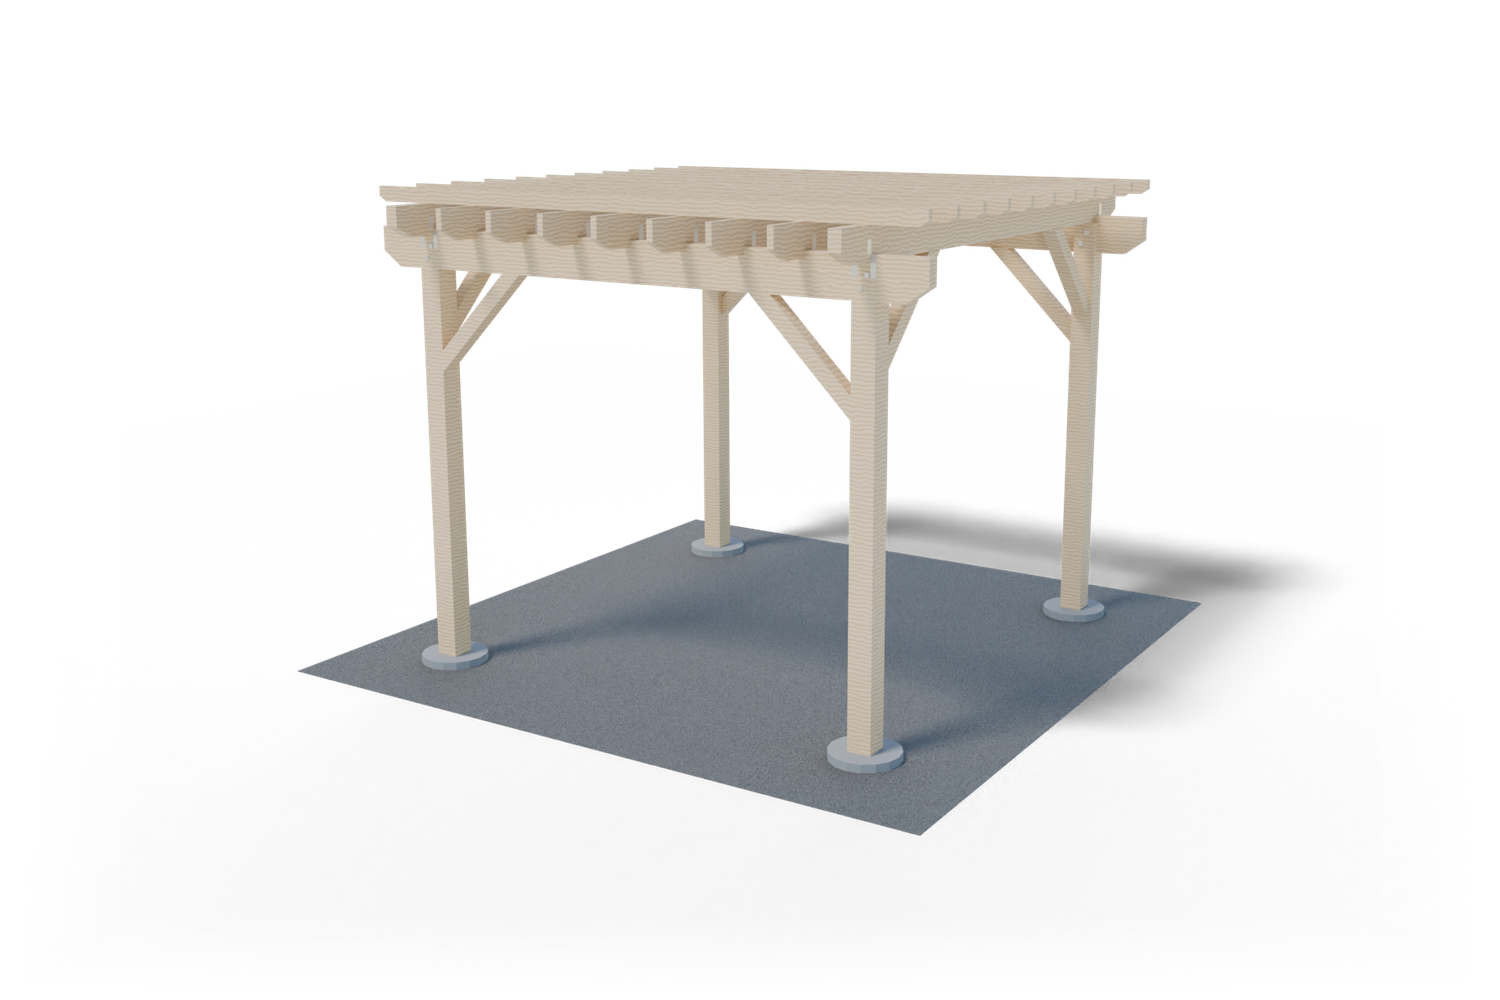
Pergola · 100 sq ft
10x10 Pergola Plan
Build this 10x10 pergola yourself. Every board, cut and step, drawn in 3D across 38 pages.
$14.99
$29.99−50%
- 30-day money-back guarantee
- PDF by email right after checkout
- Visa, Mastercard, Amex, PayPal
- Full material and shopping list
- Cut list with every length
- Step-by-step 3D views, 38 pages
- Phone, tablet, PC and Mac
As seen on
The 3DSHEDPLANS™ 10x10 pergola plan is a 38-page PDF for an open-top pergola 10 ft wide and 10 ft deep to the outside of the posts, with 8' 0" of clear height. It has four 6x6 posts set in concrete, two-board 2x10 beams, 11 rafter boards, 11 purlins and 8 knee braces, a shopping list, a cut list and 11 step-by-step sections.
Get the full plan PDF for $14.99 or download the free preview
What builders say
We aren't DIY-savvy and needed something simple. The plan was extremely well laid out and easy to follow.
A year ago I had only built flat-pack furniture. The plans are simple to follow, and you don't need years of experience.
The illustrations are fantastic, and the shopping list helped me buy the right materials. It took me five days to build my shed.
10×10 pergola plans: what you get
These 10×10 pergola plans are for a freestanding, open-top pergola 10 ft wide and 10 ft deep, measured to the outside faces of the posts (100 sq ft). The PDF has 38 pages: a shopping list by building stage, a cut list with every length, and 11 step-by-step sections with measured drawings and a 3D view at the end of every step, from the first batter board to the last purlin screw.
The frame is built the way carpenters build a pergola that lasts: four pressure-treated 6×6 posts set 3′ 3″ into the ground in concrete, a beam of two 2×10 boards seated in a notch cut into each post, 2×8 rafters notched over the beams, 2×4 purlins on edge across the rafters, and knee braces at every post in both directions. Every rafter is held to the beams with a hurricane tie, and the beams are bolted through the posts.
The plan also tells you who lifts what. A first-time builder’s hardest part is not a cut, it is getting heavy boards up to beam height safely. So every heavy step names who lifts, who holds and in what order, and the rafters go up from a rented rolling scaffold instead of being carried up a ladder.
Every part in the lists is drawn on its step page, and the shopping list, the cut list and the drawings were checked against each other before the plan went on sale. The 10×10 pergola plan sells for $14.99 as an instant PDF download that works on a phone, a tablet or a printed copy.
10×10 pergola specs
Every number below comes from the plan’s own specs page and shopping list. Lumber sizes are nominal: a 6×6 post is really 5 1/2 in square, a 2×10 board is 1 1/2 in by 9 1/4 in and a 4×4 brace is 3 1/2 in square.
| Spec | Value |
|---|---|
| Footprint | 10′ 0″ wide by 10′ 0″ deep to the outside faces of the posts (100 sq ft) |
| Top frame | 11′ 11″ by 11′ 11″ including the overhangs |
| Clear height | 8′ 0″ from grade to the underside of the beams |
| Overall height | 9′ 6 1/2″ from grade to the top of the purlins |
| Posts | 4 pressure-treated 6×6 posts, 12 ft long, rated UC4B for ground contact, 2 on each beam line |
| Footings | 16 in holes, 3′ 3″ of post in the ground on 6 in of gravel, set in concrete, collar finished 2 in above grade |
| Concrete | 40 bags of 60 lb concrete mix, 9 per hole |
| Beams | two 2×10 boards per beam line, 11′ 11″ long, in a 3 in deep notch, two bolts per post |
| Rafters | 11 2×8 boards, 11′ 11″ long, 14 3/8 in on center or less, doubled over each post line, 11 1/2 in overhangs |
| Purlins | 11 2×4 boards on edge, 12 in on center, 11 1/2 in overhangs |
| Knee braces | 8 pressure-treated 4×4 braces, 45 degree cuts, 24 in legs |
| Shade | an open top: about one fifth shade at noon; add shade cloth for more |
| Not included | a solid roof, panels, shade sails, electrics and a floor |
| The PDF | 38 pages, 11 step-by-step sections |
Posts set in concrete
The four posts are treated 6×6 posts rated UC4B, the rating for wood set in the ground. Each one runs 3′ 3″ into the ground. You dig each hole 16 in across and 3′ 9″ deep, tamp 6 in of gravel in the bottom, and stand the post on the gravel so water drains away from its end. No concrete goes under the post. The concrete fills around it and finishes in a collar 2 in above the ground, troweled to slope away from the wood, so rain runs off and the post foot stays dry.
The plan counts 9 bags of 60 lb concrete mix per hole, 40 in all, and the shopping list has 7 bags of 3/4 in gravel for the beds. If your frost line is deeper than 3′ 3″, you dig to it, and the plan shows how that extra depth carries into the post length and the depth check. Ask your local permit office how deep footings must go where you live.
This plan is for posts set in concrete only. It has no option for post bases on piers and none for bolting the posts to a patio slab. A post in the ground with braces both ways is what keeps a freestanding frame this size standing straight, so that is the one footing the plan draws and lists.
Each post is cut to its own length on sawhorses before it is set: 11′ 10 3/4″ for the post on the highest ground, plus how far its own ground sits below that. The top is notched for the beam and drilled for two bolts while the post is still on the ground, which is far easier and safer than cutting a 12 ft post in place.
Beams seated in a notch, not hung on bolts
Each beam line is two 2×10 boards, 11′ 11″ long. A notch 3 in deep, as deep as the two boards are wide, is cut on the outside face of each post top, and both boards sit on its shoulder. The shoulder carries the weight. The two bolts through the boards and the post only hold them in place, so the beam never hangs on its bolts. 8 carriage bolts are on the shopping list, two at each post.
The beams run 11 1/2 in past the posts at each end, and every exposed end is clipped on its bottom corner so it looks finished. The plan gives three clip sizes, one for each member, and draws each one: the beam ends 5 in along the bottom edge and 3 1/2 in up the end, the rafter tails 5 in by 2 1/2 in, and the purlin ends 2 in by 1 1/4 in. The rafter tail also comes as a full-size pattern page to trace.
The beam boards are bought with the posts, because you measure them before you cut the notches. A beam board weighs about 63 lb from the yard, so it goes up one board at a time.
Rafters and purlins: the shade layer
The plan has 11 rafter boards, each 11′ 11″ long and cut from 2×8 x 12 ft stock: 7 single rafters and a doubled rafter centered on each of the 2 post lines. They sit 14 3/8 in on center or less and run 11 1/2 in past the beams front and back. Each one has a 1 1/2 in deep notch that fits over each beam, and a hurricane tie holds every rafter board to every beam, 22 ties in all.
On top, 11 2×4 purlins stand on edge, 12 in on center, and run the full length of the beams. Each purlin takes one structural screw at every rafter it crosses, 99 screws in all, and the plan has you start every one of them on the ground so the overhead work goes quickly.
How much shade does that give? In the plan’s own words: an open top: about one fifth shade at noon; add shade cloth for more. The purlins do most of the shading, so the plan helps you pick their direction: run them east to west to block more of the high midday sun, or north to south for more of the low morning and evening sun. Light vines and shade cloth laid on the purlins are fine. Do not add a solid roof, panels or a tensioned sail: this open frame is not laid out for the wind and snow a covered top catches.
Knee braces at every post, both ways
A freestanding pergola has no wall to lean on, so the knee braces keep it square. The plan has 8 braces cut from treated 4x4s, 2′ 9 15/16″ long point to long point, with both ends cut at 45 degrees and 24 in legs along the post and along the beam or rafter above it.
Every post is braced in both directions. Half the braces go under the beams at the end of the Beams step, in the beam’s own plane, so they never block the rafters sliding along the beam tops. The other half go under the doubled rafters once those are up. Each brace end lies flat on what it bears on and takes two structural screws, pre-drilled. A brace end with a gap is trimmed, never pulled tight with screws.
The brace feet start 6′ 0″ above grade under the beams and 6′ 7 3/4″ under the doubled rafters, at the posts only, so they stay above head height and the space under the frame stays open.
The lift plan: who holds what
Two people build most of this pergola. A third person is needed on the heavy days, and the plan says exactly where, who lifts, who holds and in what order. Nobody carries a board up a ladder.
- Standing the posts. A 12 ft post weighs about 140 lb. Three people stand one post at a time: two walk the top end up hand over hand while the third keeps the foot sliding into the hole. Then one person keeps both hands on the post while the other two plumb it on two faces and screw on two temporary braces. Nobody lets go until it is braced, and the next post waits until this one is.
- Raising the beams. Each beam board, about 63 lb, goes up one board at a time on short cleats screwed to the posts. Both of you lift from the ground to the lower cleats, clamp it, then raise each end in turn while the other end stays clamped. The last 3 ft go up from step ladders in two lifts of about 18 in, one end at a time, with the other end clamped and the third person holding the ladder of whoever is lifting.
- Raising the rafters. A rafter weighs about 50 lb. Two people stand it up outside the front beam and slide it up and over, a rope keeps the lower end from swinging, and the third person catches the top end on a rented rolling scaffold with a guard rail inside the frame. The boards wait flat across the beams until their turn.
- Purlins. A purlin weighs about 24 lb, so one person on the ground hands it up and one person on the scaffold sets and screws it.
All three wear hard hats for the overhead lifts, nobody stands under a board, and nobody lifts long boards in wind. Nobody stands or kneels on the rafters or purlins: you move the scaffold instead.
A 10×10 pergola layout: how much room it gives
The posts stand 10 ft apart along the beams and 10 ft apart front to back, measured to their outside faces. Overhead, the top frame covers 11′ 11″ by 11′ 11″, so the shade reaches past the posts on every side.
There are only 4 posts, one at each corner, with 9′ 1″ of clear space between the posts along the beams. That leaves the whole floor open for a dining table and chairs or a seating group.
With 8′ 0″ of clear height under the beams, there is room for tall guests and for a hanging light or a ceiling fan rated for outdoor use. The knee braces start 6′ 0″ above the ground at the posts only, so they stay out of the way of people and furniture.
Under the pergola you can keep lawn, lay pavers, spread mulch or gravel, or build next to an existing patio. The plan does not include a floor, so pick what suits your yard. Leave the concrete collars uncovered, though: soil or mulch piled on them keeps the post feet wet.
Materials list for the 10×10 pergola
The plan’s shopping list has 29 items, grouped by building stage, and every board is listed in the stock length it is cut from. In short, this is what you buy:
- Posts: 4 treated 6×6 posts, 12 ft, rated UC4B for ground contact
- Beams, rafters and purlins: 4 treated 2×10 boards at 12 ft, 12 treated 2×8 boards at 12 ft and 12 treated 2×4 boards at 12 ft, with one spare rafter and one spare purlin in those counts
- Knee braces: 3 treated 4×4 boards, one of them a spare
- Footings: 40 bags of 60 lb concrete mix and 7 bags of 3/4 in gravel
- Hardware: 8 carriage bolts, 22 hurricane ties, structural screws, nails and end-grain sealer
- Temporary bracing and access: 12 2×4 boards for braces and batter boards, 28 stakes, a rope, plywood for the ladder feet and the scaffold track, and shims
The full list of all 29 items, with the cut list, is in the plan PDF.
Buy No. 2 grade or better, and pick straight boards with clean, square ends. Long boards and posts do not fit most cars or short pickup beds, so ask the yard to deliver them. The plan does not list prices because lumber costs change every week. Take the list to the pro desk of your lumber yard or home center for a quote.
Tools and rentals
Most of the tools are common framing tools. The plan’s tool table lists every one with what it is for, and flags the ones many first-time builders do not own yet.
- Circular saw, handsaw or reciprocating saw for the post notches and all the cuts
- Speed square, framing square, chisel and mallet for the notches
- Two drill/drivers, a long bit for the bolt holes and pilot bits for the structural screws
- Socket wrench, framing hammer and a small sledge for the stakes
- 4 ft level, post level, string line and a line level or laser
- 25 ft tape, chalk line and a carpenter’s pencil
- Two 8 ft step ladders, two sawhorses and four clamps that open at least 16 in
- Shovel, hand tamper, wheelbarrow, hoe and trowel for the holes and the concrete
- Safety glasses, ear protection, gloves and three hard hats
Three things are rented, and they are on the shopping list with how long you need them:
- Narrow rolling scaffold (baker type, about 2 1/2 ft wide and 6 ft long) with a guard rail set and locking casters, platform at 5 ft
- Two-person auger with a 16 in bit
- Drum concrete mixer
Use hot-dip galvanized fasteners and connectors, or screws their maker rates for treated lumber: plain steel corrodes in it.
How to build the 10×10 pergola, step by step
The PDF splits the build into 11 step-by-step sections, each with numbered steps, measured drawings and a 3D view at the end of the step. This is the order the plan follows:
Step 1: Layout and holes
Set up batter boards, stretch strings for the post center lines, square them by the diagonals and dig 4 holes 16 in across and 3′ 9″ deep.
Step 2: Cut the posts
Cut each post to its own length on sawhorses, factory end down, then cut the beam notch and drill the bolt holes at the top.
Step 3: Set the posts in concrete
Tamp the gravel beds, stand, plumb and brace each post in turn, level the shoulders with each other, then fill the holes with concrete and crown the collars. The concrete cures at least 2 days.
Step 4: Beams
Raise the beam boards on cleats, nail the two boards of each beam together, bolt them through the posts and fit the first half of the knee braces.
Step 5: Post-line rafters
Cut a pattern rafter, check it against the beams, cut the rest, raise every rafter from the scaffold and fasten the doubled rafters on the posts with their ties.
Step 6: Knee braces
Fit the other half of the braces under the doubled rafters, so every post is braced both ways.
Step 7: Rafters
Set the single rafters to their marks against strings, fasten and tie each one, then take off the temporary braces.
Step 8: Purlins
Start every screw on the ground, then set the purlins from the center outward and fasten them from the scaffold.
Step 9: Finish and care
Once the wood is dry enough, stain it, about 4 gallons for one coat, and seal the end grain.
The plan’s time table adds up to about 49 hours for two people, plus the days the concrete cures: three or four weekends for a first-timer. The skill level is careful basic carpentry: measuring, square cuts, a few notches and checking level and plumb.
Siting and the ground drop
- Ask first. Check your local permit office before you buy anything: whether you need a permit for a freestanding pergola this size, how far it must stand from the property lines and how deep the footings must go.
- Call 811. In the US, call 811 a few days before you dig so buried gas, power and water lines get marked.
- Room to work. Pick a spot with room for the 11′ 11″ by 11′ 11″ top frame, no tree limbs or wires over it, about 5 ft of working room outside the posts for ladders, and about 8 ft of clear, firm ground outside the front beam, where the rafters are stood up.
- Sheltered yard. The plan is laid out for a sheltered backyard among houses, fences and trees. On a coast, a ridge or open farmland, it asks for 14 ft posts with 4 ft in the ground (11 bags of concrete per hole) and a talk with your local permit office first. It promises no certified wind or snow rating.
The ground does not need to be flat, but measure how much it drops before you buy the posts. Push a stake in at each corner, stretch a string with a line level between them and measure down to the ground. A 12 ft post has only 1 1/4 in to spare after its 11′ 10 3/4″ cut, so any corner more than 1 in lower than the highest one needs a 14 ft post, and so does a frost line deeper than 3′ 3″. A 14 ft post covers up to 2′ 1 1/4″ of ground drop and extra depth together. UC4B posts often have to be ordered ahead, so this measurement comes first.
What is in the free 10×10 pergola plan preview?
Download the free 10×10 pergola plan preview before you buy. It shows the pergola in 3D, the build stages in order and real pages from the plan, so you can see how the drawings look and whether the size fits your yard.
| Item | Free preview | Full plan |
|---|---|---|
| 3D views and step overview | Yes | Yes |
| Material list with quantities | No | Yes |
| Cut list for every part | No | Yes |
| Measurements for every cut and layout step | No | Yes |
| Footing drawing and post layout | No | Yes |
| Every joint up close | No | Yes |
| Full-size rafter end pattern | No | Yes |
| Who lifts what at every heavy step | No | Yes |
| Price | Free | $14.99 |
Not right for you? Email [email protected] within 30 days of your purchase for a full refund.
Before you build
Rules for pergolas (height, distance to the property lines, permits and footing depth) vary by town and HOA. Check your local permit office before you build. This plan shows one way to build a freestanding pergola using common carpentry practice. It is not an engineered design, and your soil, frost depth and wind can call for changes.
Treated lumber is wet from the yard and moves as it dries, so build within a week or two of buying it, and wait to stain until water soaks in instead of beading up, which can take weeks or months. Never burn treated scraps.
Once a year, tighten the bolts as the wood shrinks, look over the ties for rust, seal the end grain on the post tops and keep soil and mulch off the concrete collars. Brush heavy wet snow off the top from the ground, and take shade cloth down before storms and for the winter.
Frequently asked questions
How deep do the posts go for a 10×10 pergola?
Each 6×6 post runs 3' 3" into the ground, standing on 6 in of gravel in a 16 in hole, set in concrete. Where the frost line is deeper, dig to it and ask your local permit office.
Can I put this pergola on a patio slab or on post bases?
No. The plan is for posts set in concrete only. Posts in the ground with knee braces both ways are what keep this freestanding frame standing straight.
How many people do I need to build it?
Two for most of the work. A third person helps stand the posts, holds the ladder for the last beam lifts and catches the rafters on the rented rolling scaffold. The plan says who holds what at every heavy step.
How much shade does the pergola give?
In the plan's words: an open top: about one fifth shade at noon; add shade cloth for more. Run the purlins east to west for more midday shade. Light shade cloth on the purlins is fine, but no solid roof or tensioned sail.
Do I need a permit for a 10×10 pergola?
Rules for pergolas vary by town and HOA. Check your local permit office before you build, and call 811 before you dig.
More about the 10×10 pergola plan
Inside the 10×10 pergola plan PDF
The 38-page PDF follows the build from start to finish, with 11 step-by-step sections. These are its parts in print order:
- How to use this plan: how to read the drawings, nominal and actual lumber sizes, who lifts what, ladder and scaffold safety and a time table for every stage.
- Overview and dimensions: 3D views, the front and side elevations with every overall size, every part named and the parts at a glance.
- Specs: footprint, top frame, clear and overall height, posts, footings, beams, rafters, purlins and knee braces.
- Permits and siting: what to ask your local permit office, calling 811, the room you need around the frame, measuring the ground drop and which way to run the purlins.
- Shopping list by section: every item with its quantity and what it is used for, grouped by stage, with the spares and the three rentals.
- Cut list: every part with its lumber and exact length, and a cutting plan for the 4×4 braces.
- Tools and fasteners: the tool list and a fastener schedule for every joint.
- Key joints up close: close-ups of the post in concrete, the beam seat, the rafter seat, the ties, the purlins and both knee braces.
- Layout and holes: batter boards, strings squared by the diagonals and the post holes dug to depth.
- Cut the posts: each post cut to its own length on sawhorses, the beam notch and the bolt holes.
- Set the posts in concrete: gravel beds, each post stood, plumbed and braced, the shoulders leveled, then the concrete and the crowned collars.
- Beams: the two-board beams raised on cleats, bolted in the notch, with the first knee braces.
- Post-line rafters: the pattern rafter, every rafter raised from the rolling scaffold and the doubled rafters on the posts.
- Knee braces: the braces under the doubled rafters, so every post is braced both ways.
- Rafters: the single rafters set to their marks, fastened and tied, then the temporary braces off.
- Purlins: the purlins pre-screwed on the ground and fastened from the scaffold.
- Finish and care: when to stain, yearly care, shade cloth and snow.
- Build checklist: a printable page to tick off each stage.
- How this plan was checked: the checks every measurement passed before the plan went on sale.
- Full-size rafter end pattern: the rafter tail at full size, to trace onto the first board.
Ready to build the 10×10 pergola?
$14.99 for the full PDF: every step, cut and board. 30-day money-back guarantee.
Similar pergola plans
All pergola plans
Pergola · 144 sq ft